Category Archives: Trim

Decks and such.

Since last we touched base there has been more odd job activity, as well as some big steps.

There’s been some ongoing varnishing, though at this point I’m basically waiting for the AwlSpar coats to dry enough that they can be overcoated with the AwlBrite.  AwlSpar I was willing to do in my apartment.  AwlBrite, notsomuch.  About half the contents of AwlBrite start with “hexa.”  For whatever reason (someone please explain to me if you know!) it seems like chemicals that start with hexa are really frigging bad for you.  Hexavalent Chromium?  Yeah, I saw Erin Brockovich.  The list goes on, but I won’t bore you.  Anyway, even though I’ve got things all masked off so that basically I don’t smell anything outside my kitchen – where I make food – I’m not going to bring that crap into my house.  This is a problem in that it needs to cure in temperatures well above what our current SF winter is providing, but I’ll figure something out.

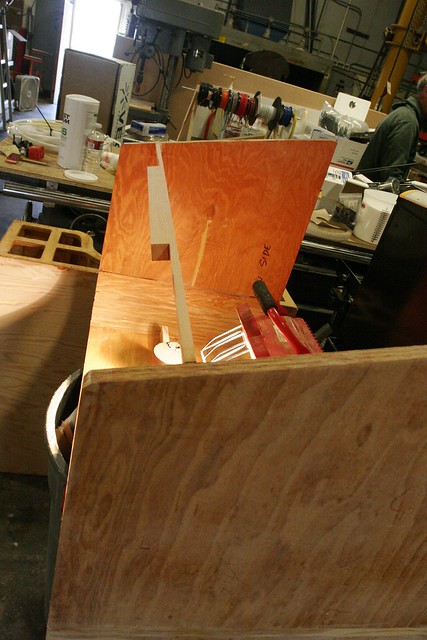
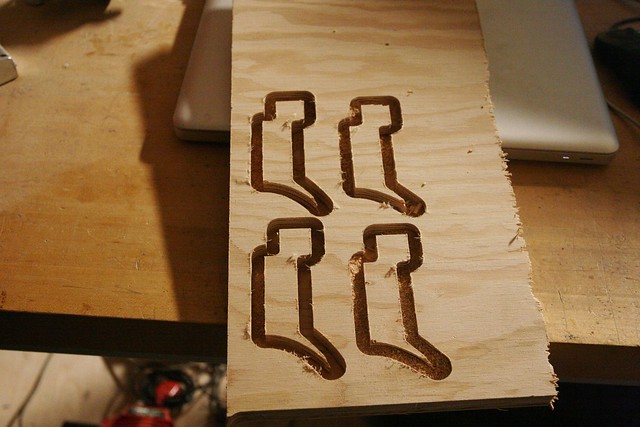
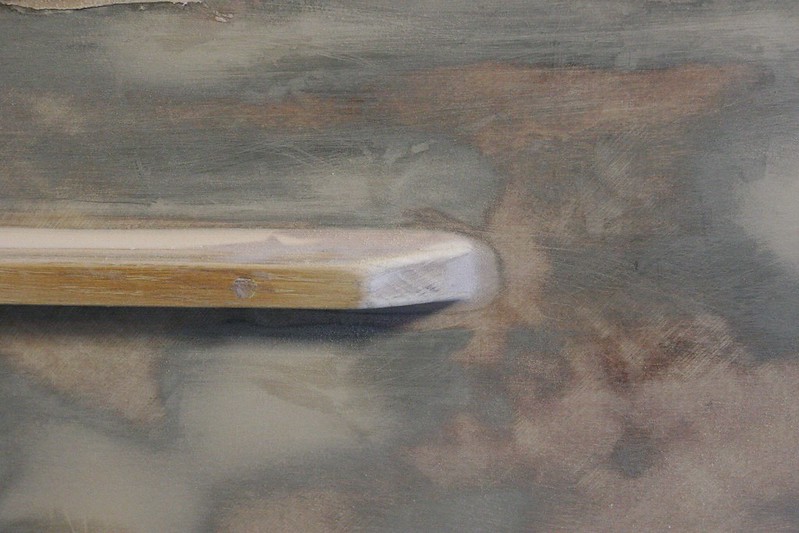
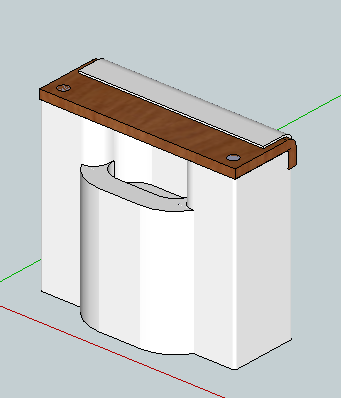
One thing that you, dear reader, have not yet seen is the veneer I built for the face of the step up to the forward casting platform area.  I decided to add a bit of flare here and represent the day shape for a boat engaged in fishing in teak inlay in the middle of the step.  For those who haven’t sat through a USCG certified captain’s license exam, day shapes are visual signals hung on boats during the day to signify certain things.  At night you use lights.  Here’s the day shape for a vessel engaged in fishing:


Here’s the fascia for the step.  See it hiding in there?:

Okay, actually, nearly everything I just said is a flat out lie.  That is, in fact, the day shape for a commercial fishing vessel engaged in fishing, but the truth is that the two remaining pieces of veneer I had weren’t wide enough to cover the step with the seam dead center, so I pieced some scraps together to make that inlay and make the whole thing a few inches wider.  It only occurred to me later that it kinda looked like the day shape.  But I like the other explanation better.

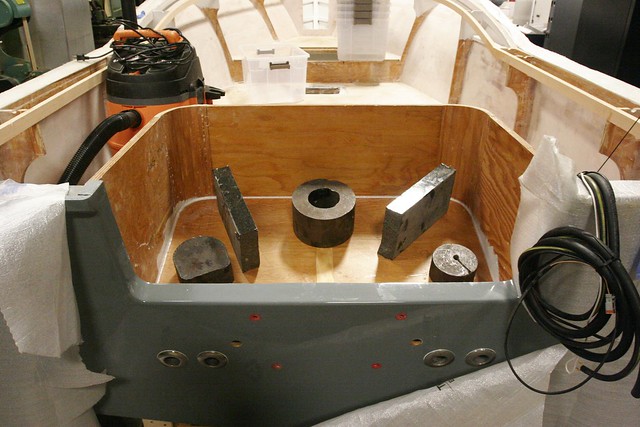
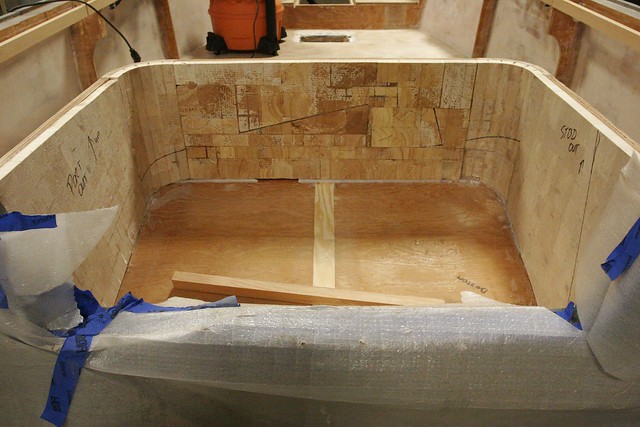
When not at home huffing varnish, I’ve gotten some big stuff done.  On Tuesday I bagged the balsa to the inside of the motorwell to thicken the walls.


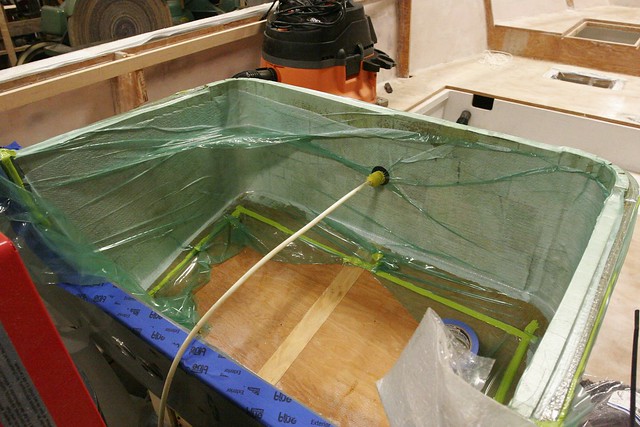
This was a rather time consuming process, principally because I decided to use up the scraps of balsa I had left over from doing the hullsides and this quickly turned into a game of balsa-tetris trying to get the entire surface covered.  I make a point of trying to be efficient in my use of material.  I might have gone too far this time, but it worked in the end.


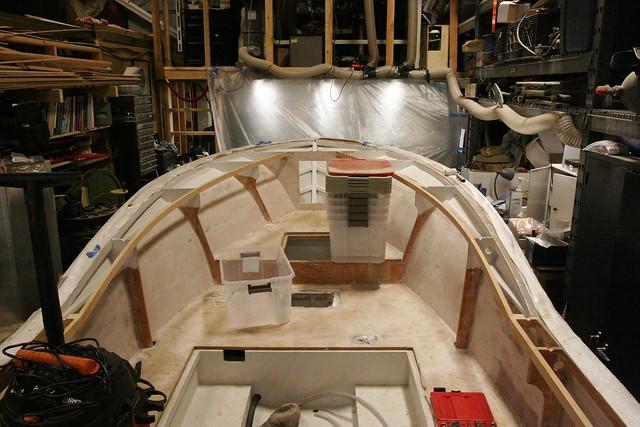
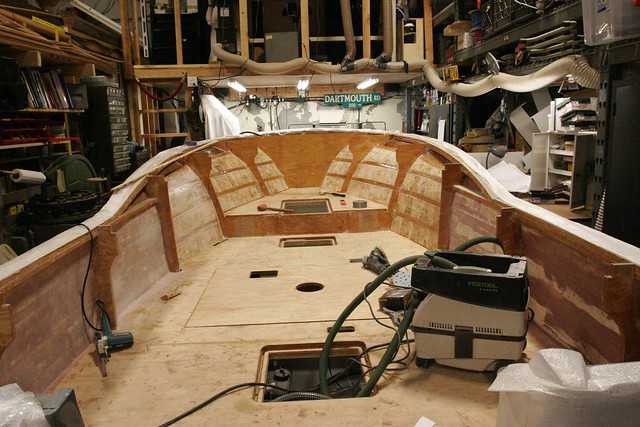
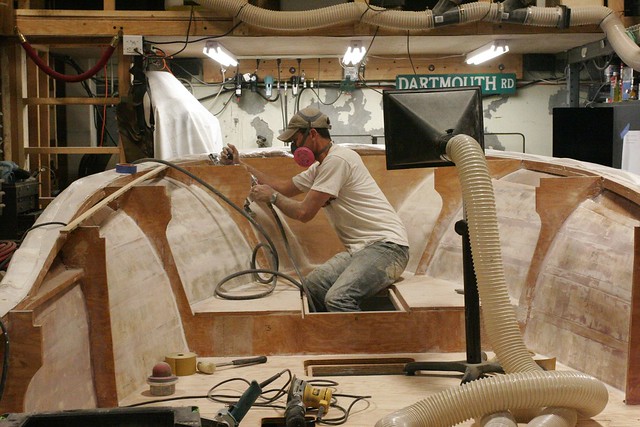
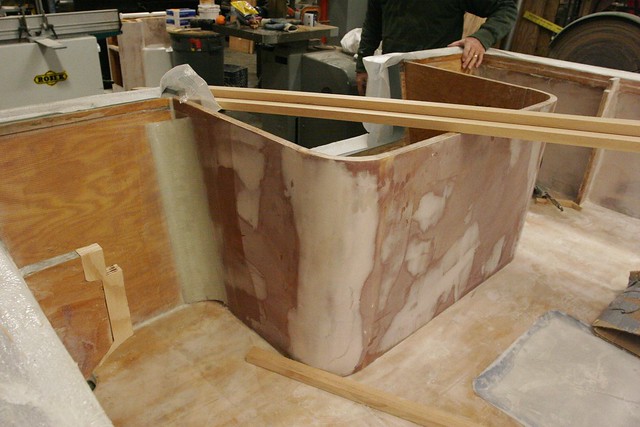
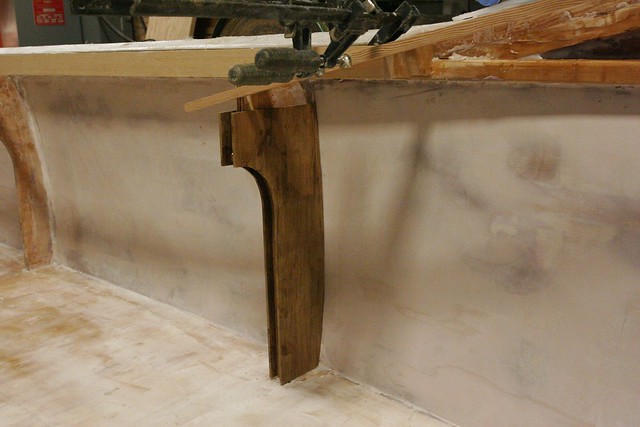
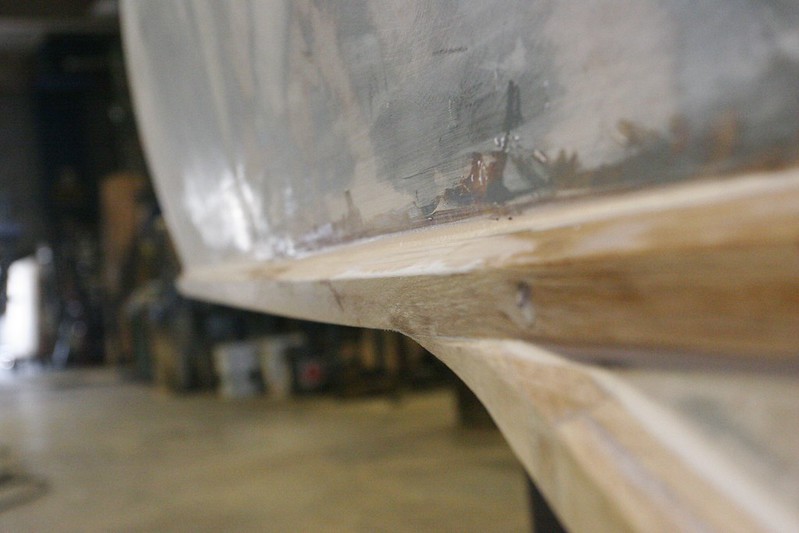
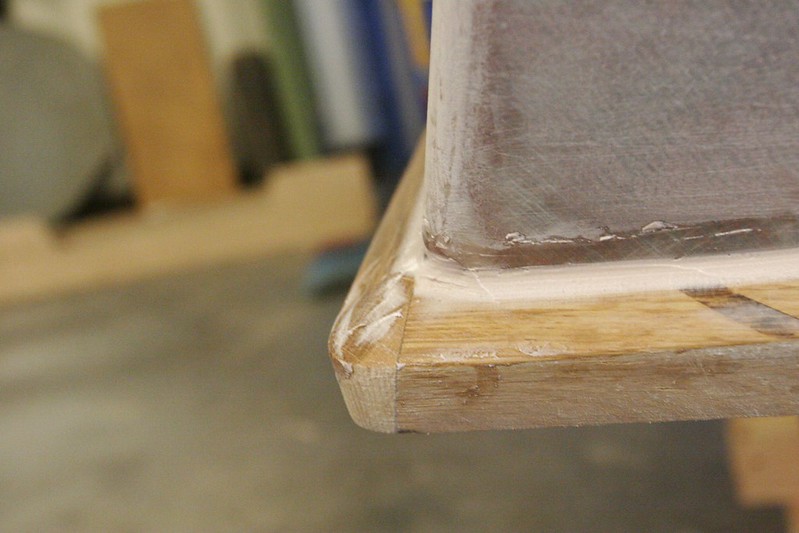
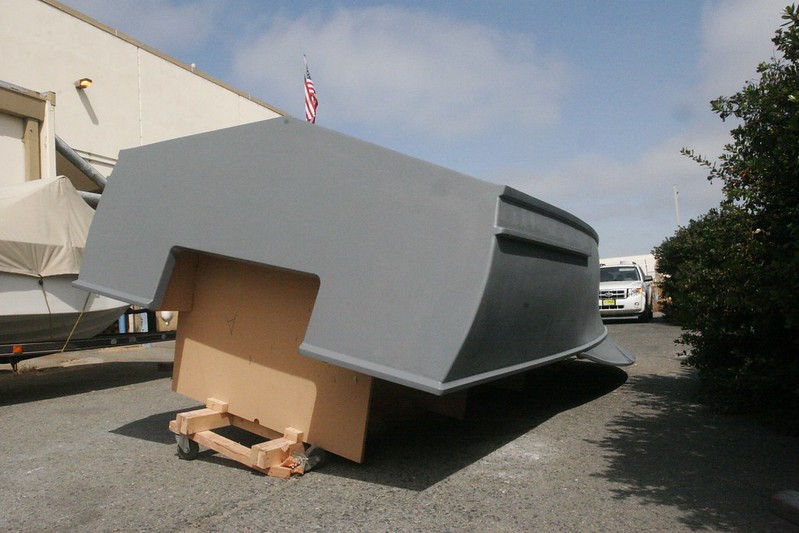
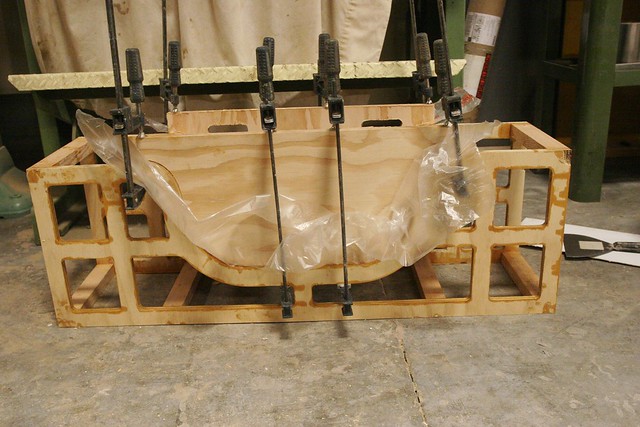
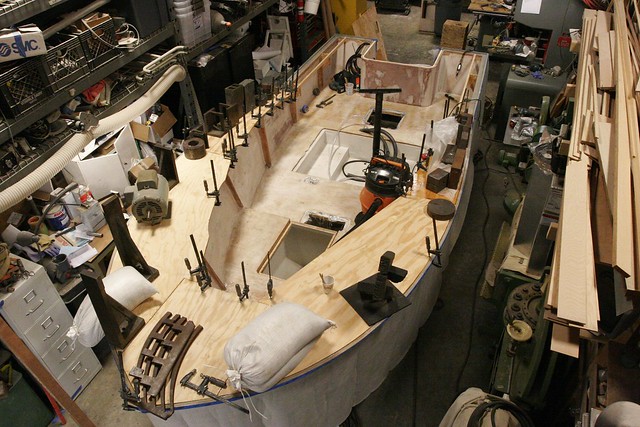
Today, I had my dad back on the job so we did what was definitely a 2-person job:  shaping and bonding the forward decks.  Here they are, all “clamped” in place.  I was out of bronze and stainless screws and didn’t want to go to the store, so we scrounged around the shop and found everything we could that was heavy to compress the decks into the epoxy.  The casters of the dolly she’s sitting on were less than thrilled, but they’re holding in there.


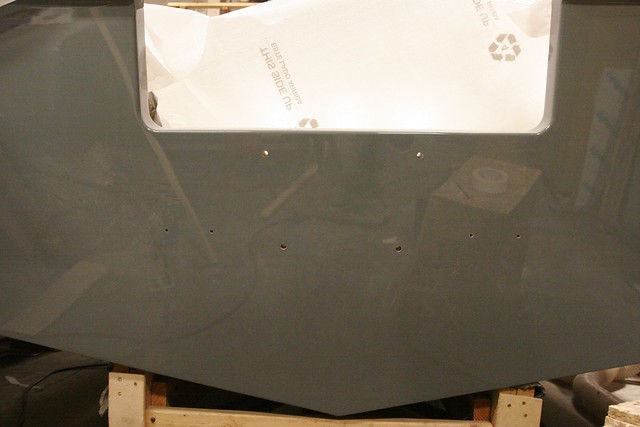
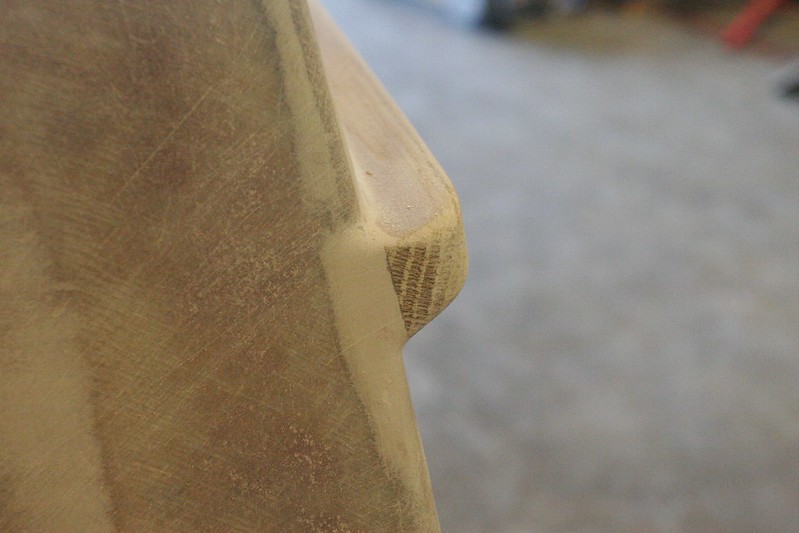
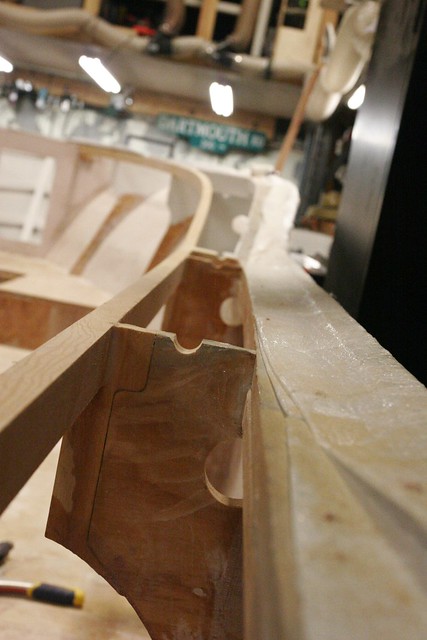
I also spent some time trying to shape the drain openings to the motorwell.  I’m close, but there’s still some fine tuning to do.


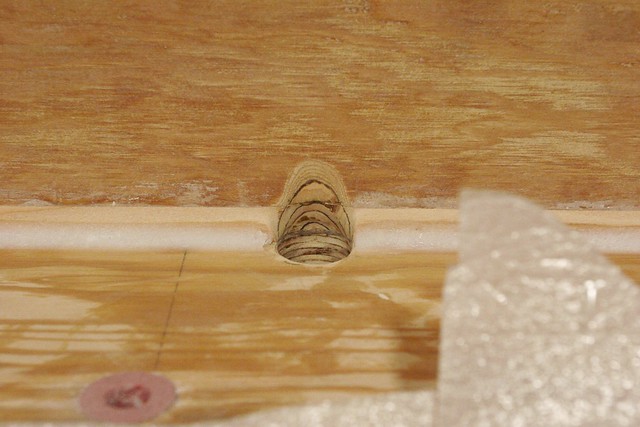
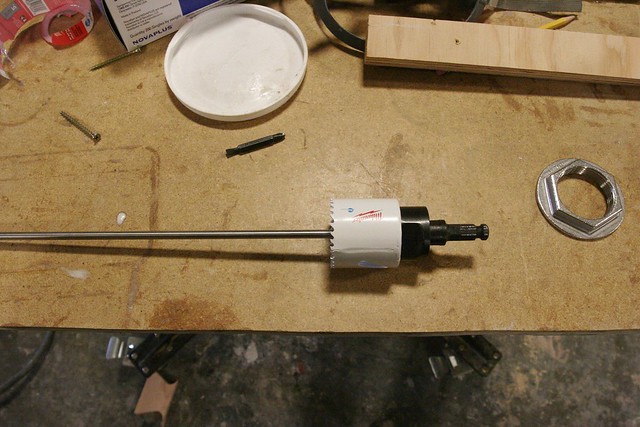
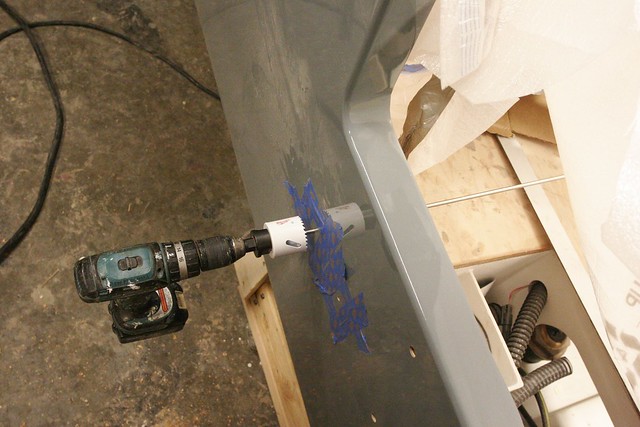
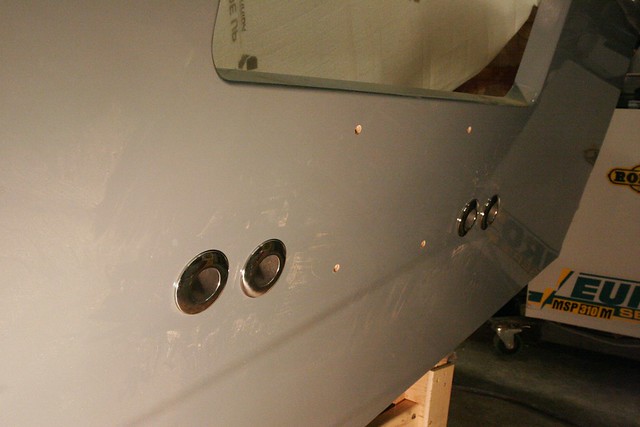
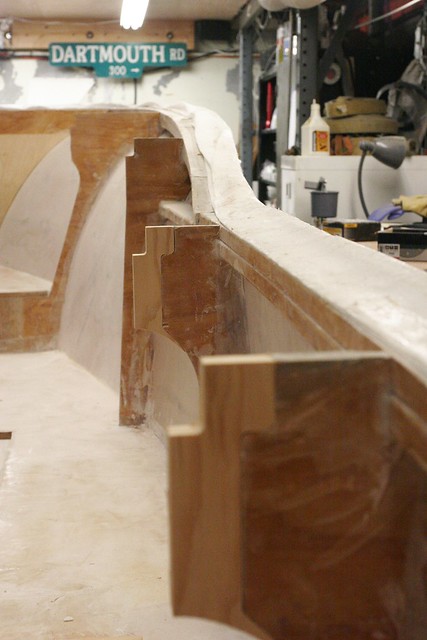
And in a similar vein, I got out the holesaw and drilled the routing holes in the aft starboard frames so I can get the steering and electrical lines to the motor.  While I was at it I drilled smaller holes in every frame for whatever random routing ultimately needs to happen down the road, and then had a bit of a brainstorm about under-gunnel courtesy lights and realized that if I notched the tops of the frames, rather than just drilling holes, I could run an uninterrupted length of LED ribbon down each side.  This would be much faster to do, and would have fewer connections that could go bad.  Here’s what those look like:


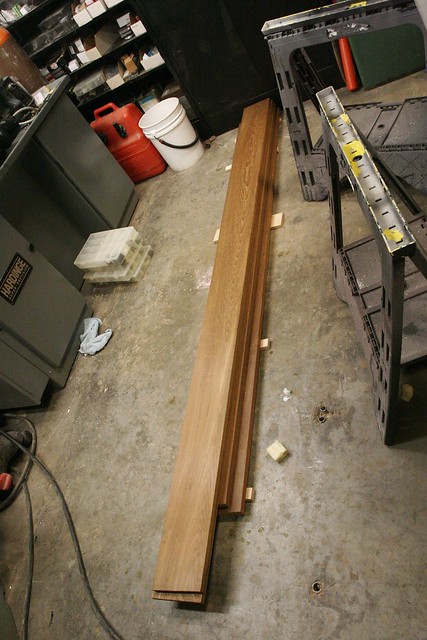
It’s been an expensive few days.  I ordered a bunch of parts for the fuel system, all the steering components, and bought teak for the cockpit gunnels and inwales.  Wanna see how much teak you get for $1000?  This stuff is $35/BF.  Crazy.  But there really isn’t anything else that comes close.


Odd jobs

We’re at the point with this project where there are lots of little details to sort out.  You bust ass all day feeling like you’re doing stuff, but at the end of the day the boat still looks pretty much the same.  Sigh…

That said, there has been a bunch of stuff accomplished, some of which actually shows when photographed.

First off, I’ve cut the opening for the anchor locker door and applied InterProtect 2000E to the anchor locker, as well as the hidden portions of the hullsides far enough up that we didn’t bother to fill them with balsa.  While I was at it I did the tops of the frames since the teak covers won’t extend very far above the bottom of the inwales.

Untitled

Sorry about the curiously placed plastic crates in that photo. I got them down for a friend that wanted to use one and didn’t have it in me to climb back up and put them away at the end of the day.


I’ve also … finally … finished the work in the transom area.  Here you can see the results.  the hose furthest to port (left) is the outlet from the forward bilge hose.  Moving to starboard, we have the outlet from the aft bilge hose, the outlet from the bait tank, and finally the outlet from the sump pump.  To keep things from moving around too much I tied the port side hoses together with clamps.  This made a big difference.  On the starboard side, I actually added a block that I could attach a clamp to for the sump outlet.  I did this because the sump hose is 1″, but the throughhulls I found didn’t come in 1″, only 1 1/8″.  I had to adapt using barb fittings and a short length of 1 1/8″ hose, which means there’s a lot going on there.  I wanted it well supported.*

Untitled

If you look at the starboard side under the throughhull plumbing you’ll see some wiring and hoses that disappear into the corner. That’s the fuel line, the oil line, and the oil level sender cable. They route up through the fillet-chase on the outside of the motorwell. There’s also a piece of leechline tied off to the hose mount. That’s a pull cord in case I ever need to get anything else through that chase.

Having now finally finished everything I could think of in the transom area I boldly decided to do something that looked vaguely like progress and I bonded in the motorwell bottom. Here it is with a bunch of steel drops and some scraps of granite holding it down while the epoxy cures. Also to the right in this photo you can see the hoses and wires that are run up the chase:

Untitled

Further progress on the hullsides is somewhat impeded by the varnishing process for the frame covers. I’m still deciding if I want to prime before or after putting those on. In the meantime, the kitchen in my apartment is masked off to try to keep the fumes down while I varnish the covers here. It was just too cold in the shop.

While the varnish is going on – it’s going to take quite a while – I can now begin work on the gunwales and the inner part of the motorwell. I may also take a crack at mocking up the console to make sure I like what I’ve designed on paper.  Would be good to get that in progress sooner than later.

-Ben
 

*Note:  1 1/8″ barb fittings in bronze, brass or marelon are scarce as hen’s teeth.  Originally I used a plastic adapter that’s purpose built for going from 1″ to 1 1/8″, but I got nervous about using plastic since this would be a bear to change later.  (Doable, but annoying.)  I bought a 1-1/4″ threaded barb fitting in brass and turned the threaded end down to a barb I could get into the 1″ hose, and the 1 1/4″ end down to a 1 1/8″ barb and used that instead.  I feel better now.

Bandsaw beats finger

So, if you were contemplating a real world test to confirm your suspicion, I can spare you the trouble. Shoving one’s finger into a bandsaw yields a single result. And it isn’t damage to the bandsaw. Sigh…

IMG_1423

Beyond inflicting damage to my extremities, we’ve been plugging away at interior minutiae.

The balsa filled sections are glassed and faired. Or mostly faired. It’s proving more challenging than expected to get them “right” and I keep putting more compound on them and sanding it off to an unsatisfactory result. And then repeating. But it’s more or less done. In addition – and I’m just going to rattle off a litany of things we’ve done and then add a bunch of photos – we’ve drilled the motor mount holes in the transom, drilled the thruhull holes in the transom, glassed the interior transom, glassed, faired and installed the motorwell, installed the “fillets” to the lateral sides of the motorwell-transom junctions that serve as chases for fuel and oil hose, glassed the forward bulkhead, installed the deck beam system for the aft areas, and glassed the deck. We’ve also started work on the teak cladding for the frames.

Next up, we’ll finish the cladding and get started on varnishing them “off the boat”. While that’s happening, we’ll prime the interior so it’s ready to paint once the cladding goes in. After varnishing the teak we’ll install and fillet it in, and then mask off the varnished surfaces so the paint comes straight to the varnish.

We’ll also get going on the forward deck support structure and cut the anchor locker door in the forward bulkhead.  Oh, and we can now install the thruhulls in the transom and finalize the plumbing, after which we can install the motorwell bottom.  Still slogging away, but now that the interior hull is fair it should start to go a bit faster. We’ll see!

Untitled

Untitled

Untitled

Untitled

Untitled

Untitled

Untitled

Untitled

Untitled

Untitled

Untitled

Untitled

Untitled

Primer. For real!

Hello from Tuscany!

Another long delay since my last post.  A thousand apologies.  I was extremely busy trying to get to a point where I could take a week off, and then for the last few days I’ve been in Italy.

Since our last update, the focus has been on continued fairing.  Lots of sanding and filling and rubbing with hands, looking for high and low spots.  As it turns out, one of the best ways to tell if something is fair is to close your eyes and run your hands over it feeling for places where things have unexpected bumps or depressions.  Your hands are very sensitive instruments.

I’ve pretty much concluded that the fairing process could continue for as long as one wanted it to.  There’s always something that could be slightly better.  But eventually you reach a point of diminishing returns and call it done.  We have reached that point!

Interestingly, near the end of the process I discovered a rather large area that I hadn’t noticed previously because it was a macro fairing problem, not a micro one.  If you look at this photo, the starboard bow has some large patches of compound on it.  Would have been a bummer to miss that.  Under glossy paint it would have been really obvious.  Unfortunately, the thing that ultimately helped me discover the issue was that in one spot I ended up sanding through the first axis of the glass.  This is a really strong part of the boat anyway, and the issue was very near a bunch of framing on the backside, so I’m not worried about it.  But it’s one of those “doh” moments that – were you to build another boat – would be a good lesson for next time.

We also had to do a bunch more detail work to get the trim all smoothed out and faired in.  This is a tedious process, but an important one.

The sheer guard needed to be continued around the transom.  This proved to be tricky because the angles of the boat beneath change abruptly and then the profiles don’t line up anymore.  I cut some wedges from the oak and glued them to the back of the two transom trim strips to help get better alignment.  Then I bonded them to the transom leaving a 90-degree gap at the corners and filled the gap with a block of oak that was shaped to the appropriate transition profile after the epoxy cured.  The junctions to the hull were all filleted and sanded smooth.  This photo is post-fillet, pre-sand.

After all the sanding, I finally decided we were in shape to apply a first coat of primer.  The primer – gray AwlGrip 545 – was applied in a heavy coat with a roller.  After it was cured I pushed it outside to tarp it for the week while I was gone.  I didn’t take pictures inside because I figured it would be better to do so in the light, but due to a minor distraction didn’t end up taking good shots of the primed boat.  The distraction?

CATASTROPHIC FAILURE!

This strongback was never really built as a rolling dolly.  Initially it was on the ground, and then I took a set of (likely under-rated) casters and bolted them to the bottoms of the longitudinal members so I could move her a few feet back and forth around the shop.  This was fine.  When we then pushed it outside, the longitudinal members started to “fail” by rolling side to side.  To address this I re-mounted the casters on 2x4s and screwed these to the bottoms of the frames so the twisting force wouldn’t act on the strongback.  Unfortunately, it was too much for this 2×4.  It cracked when the wheel hit a bump in the road and the whole boat nearly rolled over.  It came to rest about 1″ from contacting the ground, so no major harm was done, but it was a heart-stopper.  I mounted the casters to a 4×4 and attached that with some flanking gussets to keep the 4×4 from rolling over, but clearly this is not a good long-term solution.  I’ll need to address that when I get back.  Interestingly, the boat actually moved on the strongback – if you go back and look at the early pictures you can see that the stringers just sit in slots in the MDF, and on the starboard side they’re now a few inches above the bottom of the slot.  This won’t affect us in the near term, and once she’s painted she gets turned over anyway.

After the crisis was resolved, I wrapped her in a tarp and headed to the airport.

Next week we sand this coat of primer, look it over and fill any pinholes or depressions that became evident once the primer went on, and then put on a couple of coats of white primer.  This all then gets sanded to about 320 or 400 grit and then we paint.  I’m hoping the paint is done by the end of next week, but if history is any guide it will take longer than anticipated.


-Ben


Details, details, details…

Now that the trim is installed, we’re down to the brass tacks stage of prepping the hull to be painted.  All the random pinholes need filling, the sharp edges need rounding, the sharp corners need filleting, and the curves need to be triple checked to make sure they look right.

It takes a lot of time filling and sanding and filling and sanding and filling and sanding.  Fortunately, the (rather pricey) fairing compound I’m using is ready to sand 4 hours after application which means I can make pretty full use of the day.  I prep an area for fill, put the compound on, and then go work on another area for a while.  By the time I’ve got compound on that area I can often start sanding the place I faired before.

Here’s the kind of thing I’m doing.

In this photo, you can see the fairing I’ve done to blend the forward end of the spray rail into the hullside.  When this is painted, it should look like a smooth, organic bulge that gradually builds from the hull.  Here’s the aft end of the quarter guard.  Rounded over and smoothed into the hull.

Here’s the front end of that same guard.

I’ve got a couple more days of this kind of thing before it’s ready for a first coat of “real” primer.  By “real” I mean that it’s not just to help the eye find imperfections.  But I undoubtedly will find a few things I missed when that first coat goes on.  It’s the nature of the beast.

And while I am generally able to keep fully occupied through a day right now, there are times I’m waiting for things to dry.  I’ve begun building my leaning post, which allows me to fill those times.  I started off by buying a 22 gallon bait tank from Pacific Edge tackle.

This is a helpful starting point that I’ll be turning this into something that looks like this:

Screen Shot 2013-09-05 at 8.10.47 PM

To make that happen I’m first building a piece that will be bonded to the top of the baitwell, and then I’ll build extensions for the sides at the bottom.  I cut the top and bottom of the upper piece on my CNC machine and then bonded them together with some blocks of Doug Fir.  Then, to plank the curved piece that contours the opening to the bait well, I cut a bunch of 3/8″ wide strips of 1/4″ plywood left over from planking the hull and bonded them in place, holding them tight using some plugs I cut out, also on the CNC.  A picture says a thousand words.  This next image shows the part on it’s back.  In other worse, you’re looking up from the bottom.

The plug is separated from the glued assembly using plastic and clamped in place.  Tomorrow it will be removed and discarded, leaving a frame with a solid, curved panel with the same curve as the opening of the baitwell.  The frames that will be part of the final leaning post have been skeletonized to save weight.  Here’s a look from above.  You can see that the curved panel is formed of small strips butted up next to each other.  Eventually this will be faired, glassed, bonded to the baitwell and faired again.

This really just gives me something to do when I’d otherwise be twiddling my thumbs, but it’ll be nice to have gotten a head start on the interior furniture once I get to that point.  Tomorrow, it’s back to sanding and fairing and sanding and fairing and…

-Ben

Adding trim.

The hull is now fair enough that it doesn’t make sense to take it any further without first putting on the exterior trim.  The “trim” is a collection of boards that guard the hull, deflect spray downward, and add to the aesthetic qualities of the boat.  It also serves to add significant effort to the overall boat construction process, right at the point you think you’re close to getting it painted and turned over.

I’ve chosen to construct these trim boards from white oak because it’s hard and strong.  As mentioned previously, the primary purpose of these boards is to protect the hull, and so they’ll be subject to significant abuse over the life of the boat.  Oak is up to the task.  My dad and I spent a couple of hours on the planer and table saw to shape a number of 4/4 planks down to the appropriate profiles.  This is actually pretty tricky woodworking.  Some of the boards are angled on three sides, and the forward sheer guard – which is angled on two sides – needs to be laminated from two layers to make the bend.  To make the two-piece boards we created two strips that are half the width of the finished plank and bonded them together with double-sided masking tape.  Then we cut the profile and pulled them apart.  The two pieces could then be bent around the boat and glued back together.

Here she is after the bulk of the trim is installed.

Note that the wood will eventually be faired into the hull, primed and painted, so it won’t contrast as much as it does in these pictures.  But everything except the spray rail gets covered in ($25/ft) stainless trim, so there will be a strong visual component to these pieces.

This is one of the first parts of the project where I’m somewhat dissatisfied with the result.  The line formed by the aft sheer guard and extending forward into the hullside rubrail isn’t as straight as I’d like it.  It’s just really tough to get a board attached to a surface that twists as much as this hull does to lie straight.  I think if I had this to do over I would have come out at night when the light was low and used a laser level to scribe a straight line on the hull.  Live and learn.  You can see in this photo the less-than-straight line.

I doubt anyone will notice it but me – and devoted readers of this blog – but I hate visible mistakes and it bothers me.

Anyway, the next step is fairing all these boards in so the transitions are smooth, and then doing the final fairing before priming and painting.  It’s so close I can taste it.

-Ben