Category Archives: Tools

Tastes like chicken

My father loves his dog.  In some respects, this is a perfectly normal state of affairs, but when one probes more deeply it becomes a bit odd.  First off, my father has, for as long as I can recall, claimed to despise dogs.  We had them growing up.  He hated them.  Wanted nothing to do with them.  Actually took a swing at one once and, thinking better of it mid-throw, pulled his punch and ended up hitting a post accidentally instead, breaking his hand.  Speaking of hands, when out and about, whenever he saw someone walking a dog around the neighborhood he would form his right hand into an imaginary pistol and “shoot” the dog being walked.  On more than one occasion, the animal’s poor owner noticed this bit of theatrics and recoiled in horror.  My father has always hated dogs.

Now, it’s clearly rational to think that the slow march of time might soften the heart and that there might be a place for a dog in his world.  A nice black lab, perhaps?  Or a blue tick hound?  Maybe a shepherd of some kind?  A terrier?  Any of these have a degree of masculinity and utility about them that would make them seem to fit with his persona.  The dog he dotes over, however, is this thing:


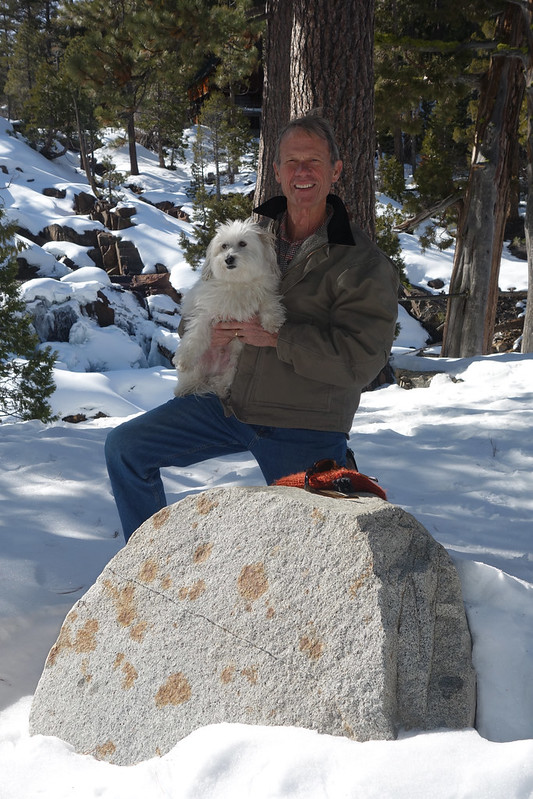
It’s a fluffy little furball with an underbite, an annoying propensity to howl, and a rather disinterested relationship with humanity that smacks of superiority.  Honestly it’s more like a cat.  And my dad is definitely not a cat person.

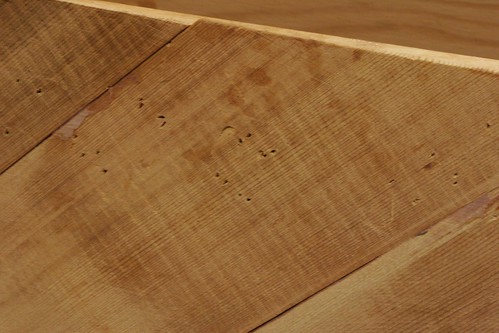
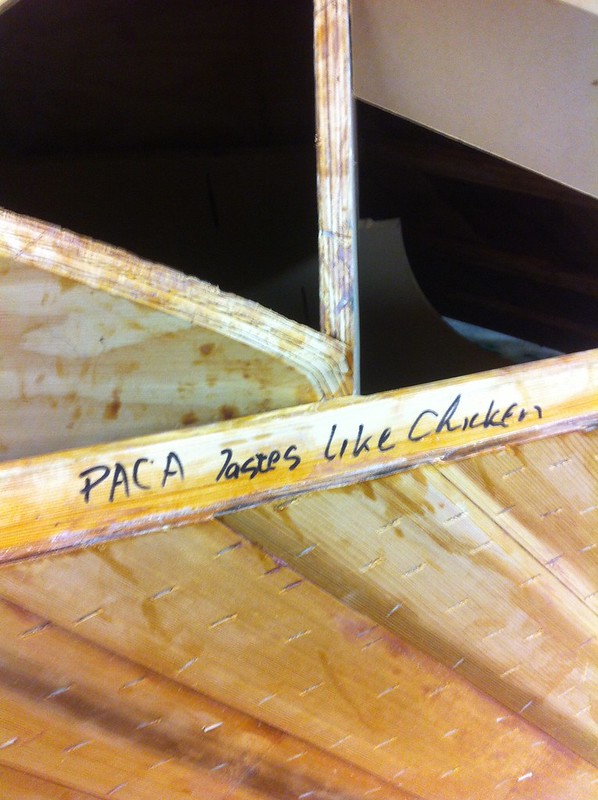
Anyway, this is a long-winded introduction that’s necessary to help us understand that in much the same way construction workers will etch their names in foundations in places that won’t be seen when the building is finished, but that marks forever their contribution to the effort, my father feels compelled to scribble his dog’s name, Paca (Palo Alto, California) on the boat to forever enshrine it, entombed in epoxy and paint, but there for the knowledgeable.

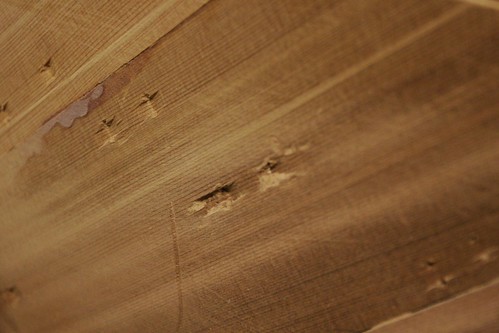
And so, from time to time, I find “PACA” scrawled on the boat without explanation or excuse.  I’ve had enough.  Today I started fighting back.  Here you can see my addendum to his scribblings.  I’m going to make a habit of this going forward.

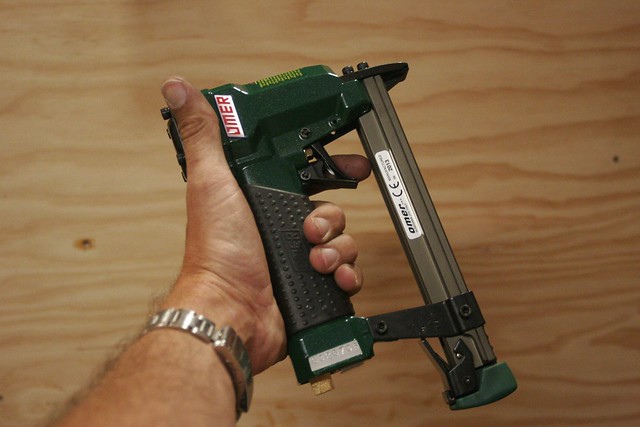
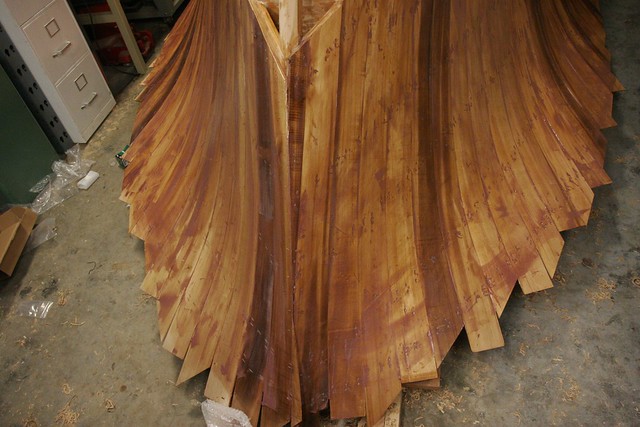
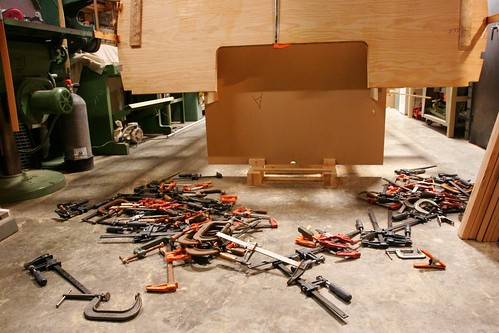
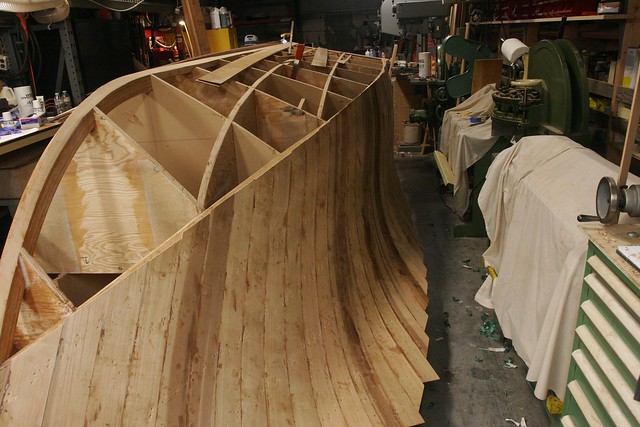
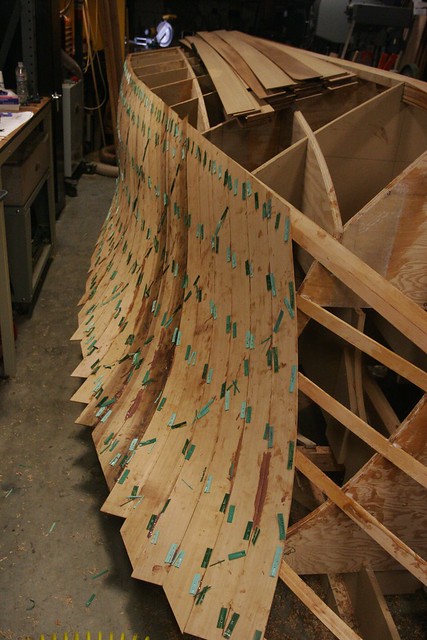
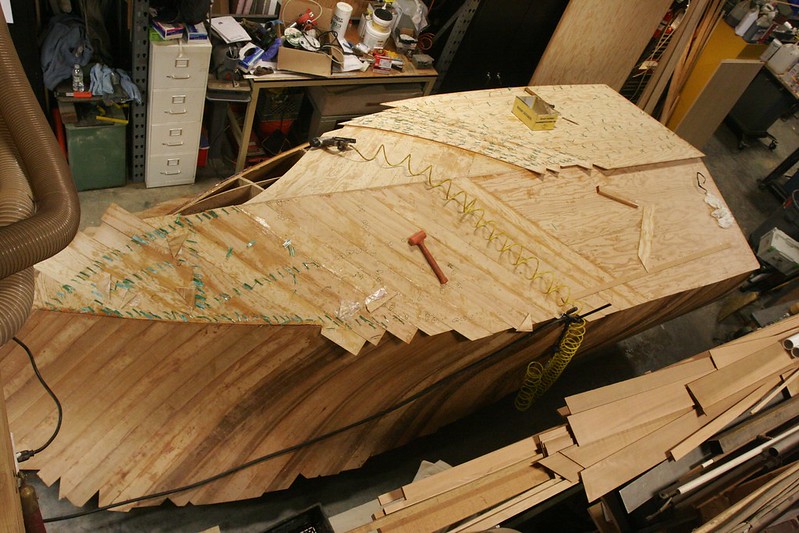
As for the boat, we’re making progress on the bottom planking.  Here’s a shot as of this morning, with one side completed and the other side partially complete and with a second layer started.  Since this photo we’ve finished the first layer on the port side and done the aft part of the starboard.  We’ve got about half the boat still to go on this last layer of bottom planking and then we’ll be done with the planking!  I’m looking forward to that.  I’m getting a little tired of spiling and stapling at this point.  It’ll be nice to do something – anything – else.

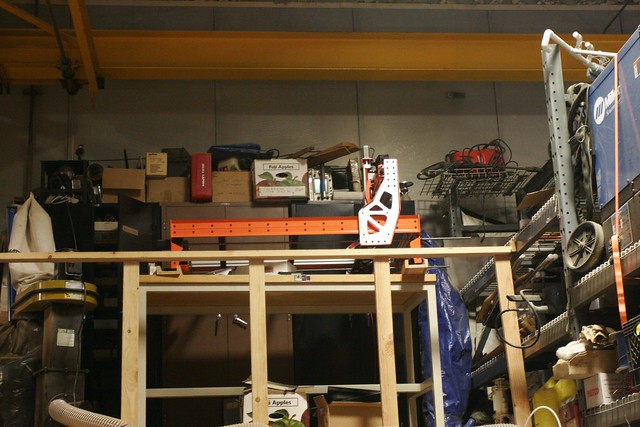
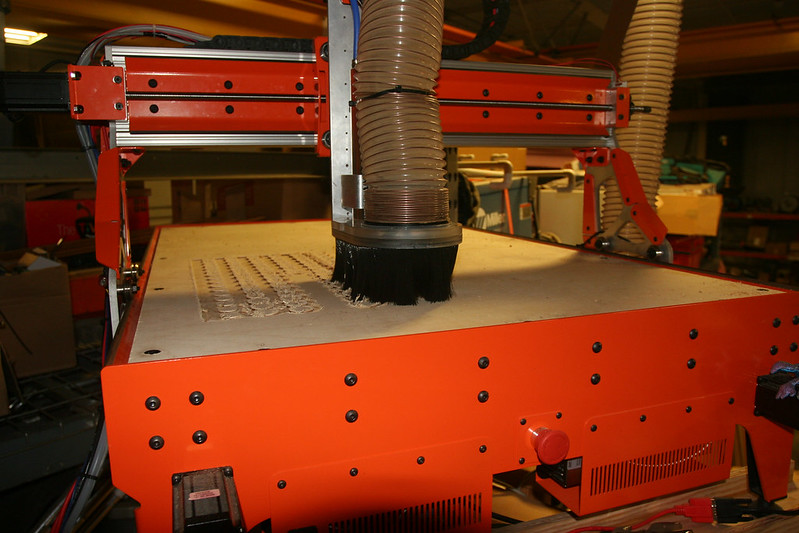
Oh, and I got the CNC machine up and running.  Still a bit more to do for it to be operational, but here’s a shot of it cutting out its own vacuum table plenum.  Really all I need to do at this point is finish the plenum and then plumb up the vacuum system and it’ll be DONE.

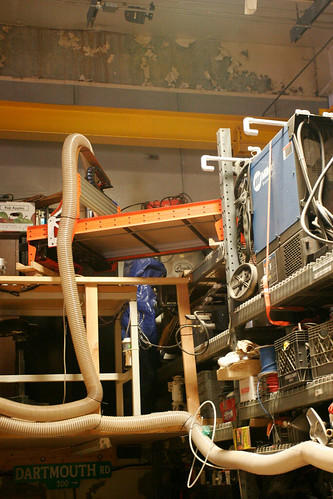
It’s kinda funny having this tool up on the mezzanine, bridging between the table and the pallet rack, but it’s really turning out to be a pretty good place for it.  All the work happens “inside” the machine, and it’s not hard to get a piece of material that’s as big as the machine will allow up there, so it gets it out of the way.


That’s it for today.  Onward and upward!

-Ben

Back in the Saddle

Enough with the distractions.  We’re back to work as of Monday morning.  I didn’t write yesterday because I’ve lost the cable to get the pictures off my camera and I figured nobody reads anything that doesn’t have some eye candy.  Today I went and got the spare cable from the big boat.

Yesterday and today were both frustrating, but for different reasons.  Yesterday we began by pulling the remaining metal staples from the port side of the hull.  Our hope was that the UPS guy would show relatively early in the day – usually it’s by around 10 or 11am.  Unfortunately, by 2PM there was still no sign of him, so we pulled the plug.  My dad went home and I puttered about waiting for Mr. UPS, doing some assembly work on the CNC router kit I recently purchased.

Blisters notwithstanding, here’s a big part of the reason we’re waiting for the plastic stapler.  Normal staple holes from a normal staple gun look like this:

But pulling the handle  that shoots those buggers a couple thousand times a day is a recipe for angry hands.  So we bought a narrow crown pneumatic stapler (which is what Home Despot had in stock).  Here’s what those holes look like when the staples are removed.:

No bueno.  And if you zoom out a bit, you can see the extent of the destruction.  Note that in a lot of places the grain of the plank actually splits a bit on either side of the staple.  This isn’t a fatal issue, but it does create a lot more work between this layer and the next:

Anyway, while my dad was away I did a light sanding on the hull to get the biggest of the ridges and bumps out as well, but … and this becomes relevant when we get to the source of today’s frustration – it didn’t occur to me to do a more meaningful fairing of the first layer to fill in the staple holes and minor gaps between boards.  I just figured we’d put a thick layer of adhesive between layer one and two, and that we’d start planking first thing this morning.

As mentioned, at 4:00 or so, the stapler arrived.

All hail the stapler that shoots plastic staples, and the staples it shoots:

All hail the unfortunate price tag!

So the first thing we did this morning was to take that handy new stapler and finish the portions of the port side that weren’t yet done.  We had to dial the pressure in to get the right penetration, but that only took a few staples to get right.  Once done we were off to the races.  Here you see, in glory that can really only be appreciated if  your hands are thoroughly blistered from pulling metal staples, planking laid with staples that never need be removed.

You also see a bit of fairing compound smoothed over them.  Which is the source of today’s frustration.  As I looked more closely at the hull today, I realized that it was going to be a giant pain to get a gap-free bond between the second layer and the first without doing some more aggressive fairing first.

This warrants a brief side note.

When building a laminated structure such as a cold molded hull, it’s really, really important that there be no air trapped in your laminate. Air is not strong.  Air creates opportunities for condensation, which can lead to rot.  Air is bad workmanship.  When laying a new layer atop an existing layer, you want the adhesive to completely fill the gap between them.  The layer of adhesive can be thick, but you really want no air in there.

Okay, so with all those little staple holes, minor gaps between planks, and ridges where one plank meets another, it just started looking really unlikely that we’d get a good layup without a ridiculously thick layer of epoxy, which would be heavier, costlier, and somewhat less strong than a thinner one.  And so, we decided to shoot today in the head and smear a layer of fairing putty on the hull.  Once that’s done, it needs to cure overnight.

So tomorrow is really what Monday should have been.  The day we move on to layer two.

First thing in the AM we sand the putty smeared hull down to a more workably fair surface, and then we can get to planking.  I’m hoping if we push really hard we can do both sides in a single day.  It will be a loooong day, but I’d really like to get all three layers of side planking done by the end of Thursday.  My dad’s away over the weekend, and while I can’t really move to planking the bottom withouth a helper, I can do a fair bit of prep work once the sides are done.

I did find a silver lining in today’s shortened day though as well.  More work on the CNC.  It’s getting close!


-Ben

Clamps: On cheap tools.

Hi, Folks.

At the insistence of my friend Tom, I’m taking a few days off of the boat build to host a group for the 4th of July at my parents’ house near Lake Tahoe.  This actually represents an unexpectedly welcome opportunity for my body to recover a bit.  The staple pulling, combined with the contortionist maneuvers often necessitated by the close confines of the space in which we’re building the boat, have me feeling pretty beat up right now.  I think I hit my head three times on the very sharp, very square edge of the platen on my Burr King sander in the past three days.  At least it didn’t draw blood.

As I sit here overlooking the lake, I’m poking around at the various photos of the build I have on my laptop.  This one caught my attention.

What you see there is a small fraction of the number of clamps you need to build a boat.  And you really need them in all different sizes and shapes.  C-clamps.  Bar clamps.  Spring clamps.  Large.  Small.  It’s daunting.  My neighbor Chris used to work at a boatyard building big fishing boats and says they had shopping carts full of the things.

Anyway, clamps are freaking expensive.  A good 12″ bar clamp from the likes of Jorgensen runs about $15.  Bigger clamps cost more.  And C-clamps are comparable.  This isn’t that bad if you’re buying 4 or 8 of them for occasional wood working projects.  When you need 100 of them to build a boat it’s a different story.  Especially if you’re not in the boat-building business and don’t have an ongoing need for a shopping cart full of them.

I ended up buying 40 12″ clamps from Harbor Freight for $3.99 each.  This is nowhere near enough, but I was skeptical about them and figured I’d limit my risk by starting “small.”  Fortunately my friend Wolfgang filled in the gap during the clamp-intensive part of the project with a giant pile of loaners, many of which are in the photo above.

Anyway, I was right to be skeptical.  These HF units are pretty much single-use.  I’ll build the boat with them, but they don’t have much of a future beyond that because they’re falling apart.  And what’s frustrating is that the fundamental flaw with them is so easy to remedy.  The connection between the grip you turn to tighten the clamp and the screw turned by the grip is ridiculous.  They just barely knurled the end of the screw shaft and pressed it into a plastic grip.  Torque it tightly and the grip starts spinning on the screw shaft, and once that happens it never really gets tight again.  There are a dozen ways they could have created that junction in a more robust manner that would still have allowed them to sell a $3.99 clamp.  They just didn’t bother to think it through.

Sure, the plastic pads would still be cheap, the bar would be a bit flimsy and the castings would be rough, but it would do what it’s advertised to do:  Clamp.

What I have now is a pile of soon-to-be-trash that really didn’t need to be.  I generally buy quality tools, and this reminds me why.  But for the life of me I don’t understand why cheap stuff can’t at least be thoughtfully engineered within the confines of its cost envelope.  Sigh…

-Ben

PS – If you know a source for affordable clamps (either bar or c-clamps) that represent a good value, I’m all ears.

Staples

My right wrist is throbbing.  I’ve iced it twice today and it’s still throbbing.  And I have blisters on my hand.  I’m sure there are all kinds of bad jokes running through your heads, but it’s entirely related to boat building, I assure you.  Yesterday we started the planking process using a staple gun similar to the one you probably have in your tool drawer.  These take a fair bit of pressure to pull and after 1000 staples (not kidding, there were about 250 left in a box of 1250 we bought that morning) my hand was killing me.  So we went to Home Depot and bought a $100 pneumatic stapler.  The only option they had was a narrow crown construction stapler. These are wonderful tools, and my wrist began smiling as I drove staple after staple with the mere pull of a trigger.  Unfortunately, however, the smile turned upside down today when it came time to remove them.  As this is a construction stapler, it drives those buggers deep.  Even at its lightest setting they’re fully bedded in the wood.  And there’s not much of a head to pull on to remove them.  Yes, we’re driving them through strips to facilitate their removal, but it’s still a nightmare getting them out.

Screaming wrist and blistered hand notwithstanding, the staples are out of the starboard side of the boat, and it’s really starting to look like a boat!  Yay!

We’ve also done about 75% of the first layer of the port side planking.  We would have finished but my dad needed to drive back to Palo Alto and the BART strike makes afternoon traffic a nightmare.  He wanted to leave early to try to beat the chaos.

The staples you’re looking at above (driven through the green strips to facilitate removal) are the last we intend to pull.  This afternoon I ordered a couple of boxes of Raptor composite (i.e.: plastic) staples and a special gun to shoot them.  It’s an expensive solution to the problem, but they sand like wood and can’t rust or rot so you don’t have to remove them.  They just stay in place and you finish the boat right over them.  After today, that seems worth nearly any price.

-Ben