Hello from Tuscany!
Another long delay since my last post. A thousand apologies. I was extremely busy trying to get to a point where I could take a week off, and then for the last few days I’ve been in Italy.
Since our last update, the focus has been on continued fairing. Lots of sanding and filling and rubbing with hands, looking for high and low spots. As it turns out, one of the best ways to tell if something is fair is to close your eyes and run your hands over it feeling for places where things have unexpected bumps or depressions. Your hands are very sensitive instruments.
I’ve pretty much concluded that the fairing process could continue for as long as one wanted it to. There’s always something that could be slightly better. But eventually you reach a point of diminishing returns and call it done. We have reached that point!
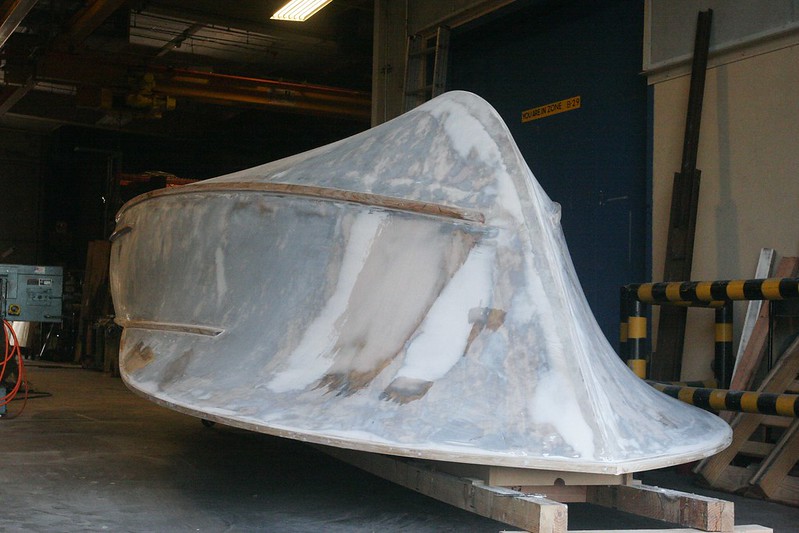
Interestingly, near the end of the process I discovered a rather large area that I hadn’t noticed previously because it was a macro fairing problem, not a micro one. If you look at this photo, the starboard bow has some large patches of compound on it. Would have been a bummer to miss that. Under glossy paint it would have been really obvious. Unfortunately, the thing that ultimately helped me discover the issue was that in one spot I ended up sanding through the first axis of the glass. This is a really strong part of the boat anyway, and the issue was very near a bunch of framing on the backside, so I’m not worried about it. But it’s one of those “doh” moments that – were you to build another boat – would be a good lesson for next time.
We also had to do a bunch more detail work to get the trim all smoothed out and faired in. This is a tedious process, but an important one.
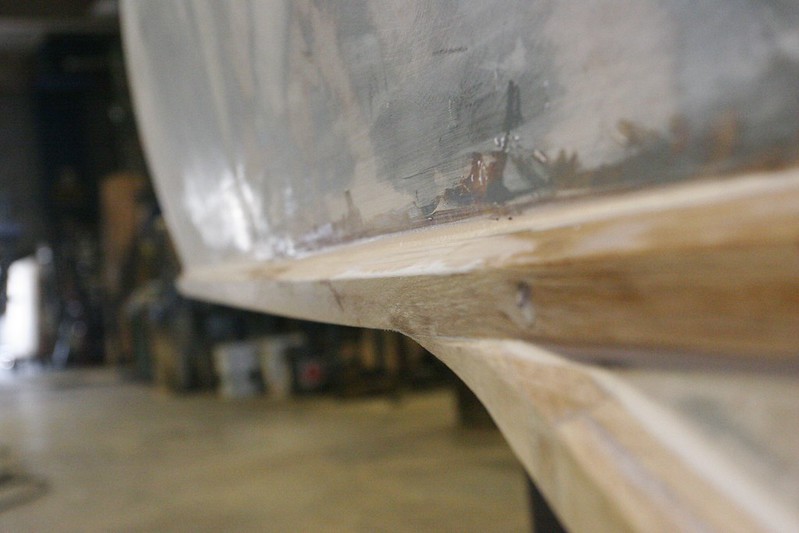
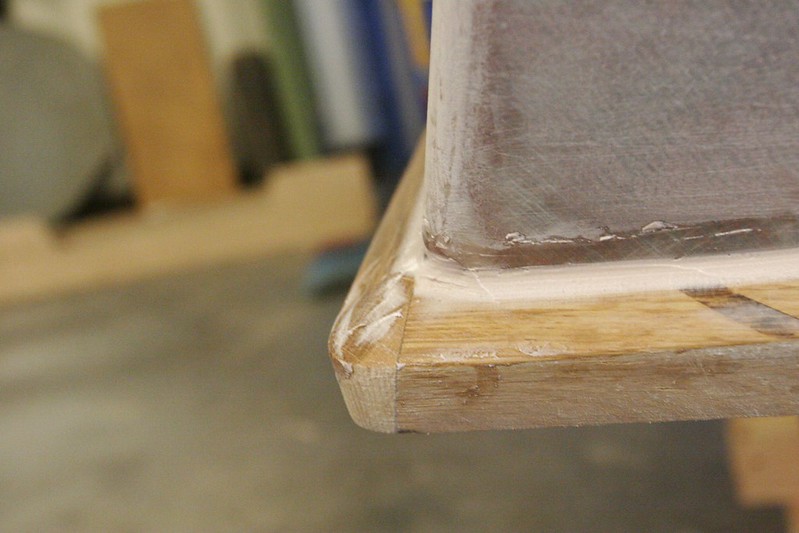
The sheer guard needed to be continued around the transom. This proved to be tricky because the angles of the boat beneath change abruptly and then the profiles don’t line up anymore. I cut some wedges from the oak and glued them to the back of the two transom trim strips to help get better alignment. Then I bonded them to the transom leaving a 90-degree gap at the corners and filled the gap with a block of oak that was shaped to the appropriate transition profile after the epoxy cured. The junctions to the hull were all filleted and sanded smooth. This photo is post-fillet, pre-sand.
After all the sanding, I finally decided we were in shape to apply a first coat of primer. The primer – gray AwlGrip 545 – was applied in a heavy coat with a roller. After it was cured I pushed it outside to tarp it for the week while I was gone. I didn’t take pictures inside because I figured it would be better to do so in the light, but due to a minor distraction didn’t end up taking good shots of the primed boat. The distraction?
CATASTROPHIC FAILURE!
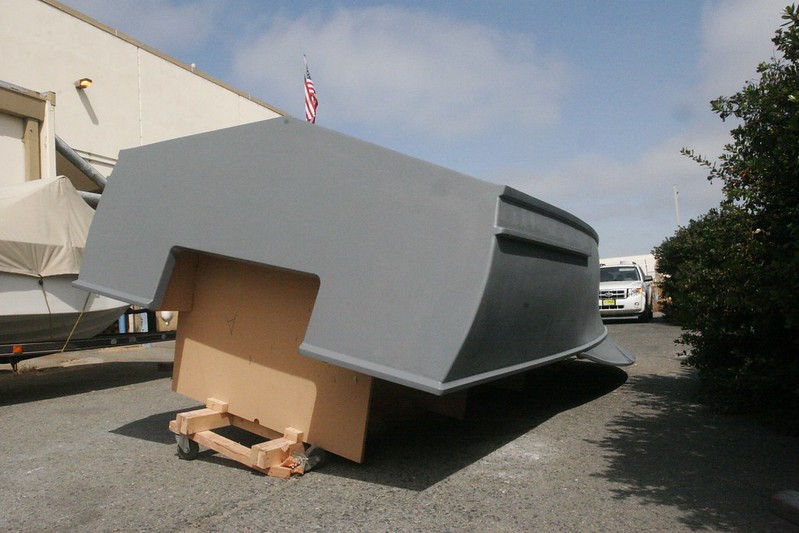
This strongback was never really built as a rolling dolly. Initially it was on the ground, and then I took a set of (likely under-rated) casters and bolted them to the bottoms of the longitudinal members so I could move her a few feet back and forth around the shop. This was fine. When we then pushed it outside, the longitudinal members started to “fail” by rolling side to side. To address this I re-mounted the casters on 2x4s and screwed these to the bottoms of the frames so the twisting force wouldn’t act on the strongback. Unfortunately, it was too much for this 2×4. It cracked when the wheel hit a bump in the road and the whole boat nearly rolled over. It came to rest about 1″ from contacting the ground, so no major harm was done, but it was a heart-stopper. I mounted the casters to a 4×4 and attached that with some flanking gussets to keep the 4×4 from rolling over, but clearly this is not a good long-term solution. I’ll need to address that when I get back. Interestingly, the boat actually moved on the strongback – if you go back and look at the early pictures you can see that the stringers just sit in slots in the MDF, and on the starboard side they’re now a few inches above the bottom of the slot. This won’t affect us in the near term, and once she’s painted she gets turned over anyway.
After the crisis was resolved, I wrapped her in a tarp and headed to the airport.

Next week we sand this coat of primer, look it over and fill any pinholes or depressions that became evident once the primer went on, and then put on a couple of coats of white primer. This all then gets sanded to about 320 or 400 grit and then we paint. I’m hoping the paint is done by the end of next week, but if history is any guide it will take longer than anticipated.
-Ben