Hello, intrepid followers of the ordeal!
In our last installment, we learned of a number of trials and tribulations that have impeded progress. Since then, the chase covers have been reconstructed and plied with 4 coats of varnish and 6 coats (and counting) of AwlBrite. Still need a few more coats before they go on, but we’re getting close to unbottlenecking this thing.
I realize that I never showed a photo of how these things are fabbed. While they’re being finished as single pieces – one for each side – it’s important that they can be taken apart later if need be. (Picture a rotted out fuel hose 15 years down the road.)
I’ve built them in halves and held them together with interference-fit stainless pins. The varnish and a little tape on the back of the seam is plenty to hold them together, and if I ever need to split them down the road I can just slit the finish with a knife and pry the removable half away. Here’s a photo of one of the units disassembled.

And here they are as of now:
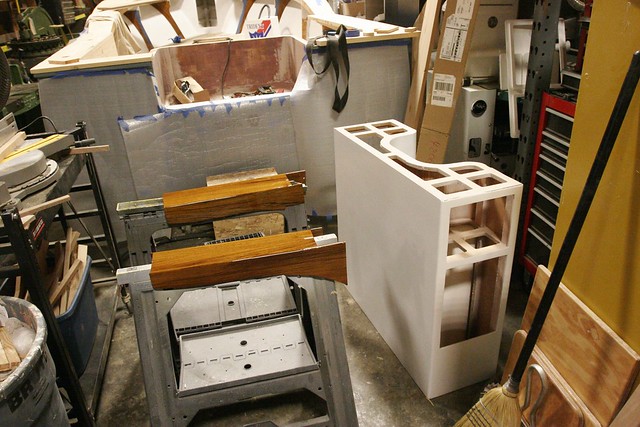
Note the leaning post next to them? That’s one of the things I’ve been spending time on while waiting to get un-blocked on the chase covers. It’s been sanded smooth, the pinholes are filled, and a couple of coats of AwlGrip 545 epoxy primer have been applied. Just needs to be sanded to about 320 grit and given its final coat of glossy white.
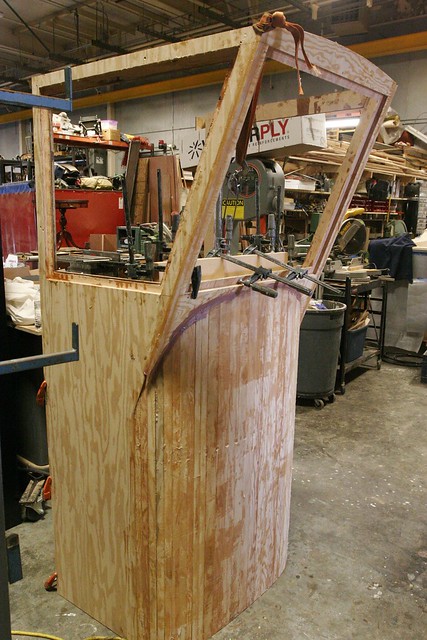
Also while waiting around we decided to get started on the console. Because the weather can be pretty crappy here in NorCal, I’m compromising the aesthetics a bit and installing a doghouse style console with glass windows and a hard top. This will let me stay a bit better protected, and also install a windshield wiper. We first wheeled her outside and tested this mockup to see what we thought:
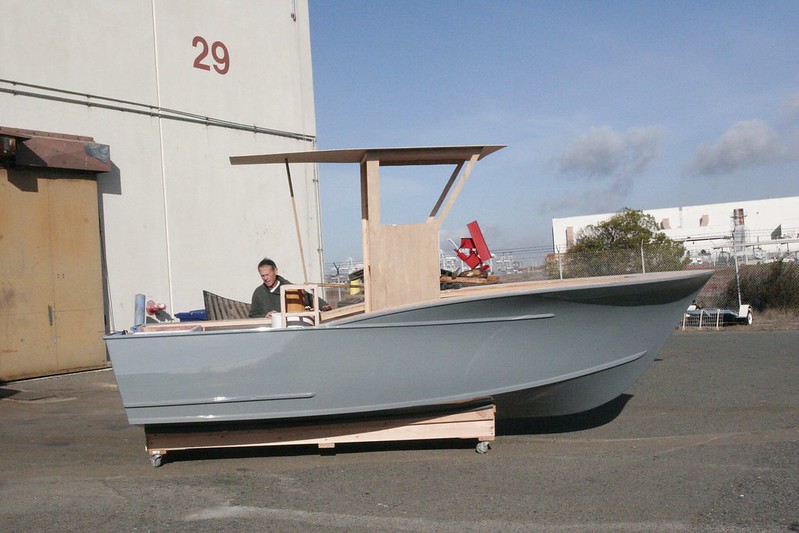
It was a little big, so we took some notes and made a few modifications and then started construction.
I should probably point out that moving the boat is fraught with peril. We’d been lucky so far but, sadly, when wheeling her out this time we made a bit of a mistake:
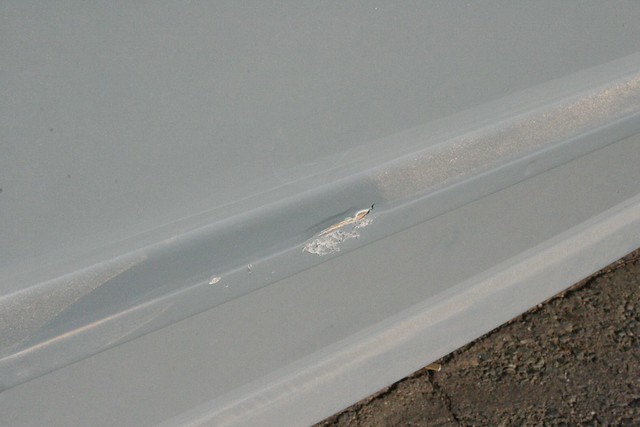
Fortunately this is in a spot that’s easy to fix. But it’s supremely frustrating.
Anyway, the final version of the console was always intended to have a curved face, so we started by creating a form and building that. This process should be familiar to those of you who’ve followed past progress. We just scaled it up a bunch.

Then we cut our panels for the sides and upper front, and bonded it all together:
Some notes here… The windows will not be framed as you’d find in so many boats this size. The glass will be bonded to the frame directly using a special adhesive made for this purpose. In essence, they all go in just like the windshield in your car. To do this requires a pretty deep rebate so that the glass will be flush with the sides of the house. The glass is 1/4″ thick and the adhesive needs a 3/8″ bead thickness so it can expand and contract properly. That’s 5/8″ total. The walls of the house were cut from 3/4″ ply which leaves only a 1/8″ thick strip for the windows to bond to. Not enough. 1/2″ ply strips were bonded to the ply around the windows in these areas to provide enough structure. All the areas visible above the console surface will ultimately be faired out to this thickness making the walls appear to be 1.25″ thick, though it really adds very little weight since it’s a small total area.
We’re presently installing the console surfaces on the inside, after which I can (a) take measurements to start fabricating the teak helm pod, and (b) sand, glass and fair the wheelhouse. While I didn’t intend to do things in this order, it’s good we’re getting a head start on the house. It’s going to take a while to do and it’s good “gap filler” work when stuff is drying on the boat.
I ordered a whole bunch of the parts that remained to be sourced last night. Plotter, radome, sounder unit, stereo, speakers, VHF, antenna, steering wheel, nav lights, battery charger, and probably a few other items. My bank account hates me, but at this point there’s actually little left to buy: White paint for the interior, windows, windshield wiper, teak decking, and some of the electrical items (switches, breakers, batteries, etc).
Starting to feel like there’s light at the end of the tunnel!
-Ben