Up to now, with the exception of laminating the stem, there’s been a lot of CNC cutting and a lot of dry assembly. But nothing really has been glued up and made permanent in a really-hard-to-undo kinda way.
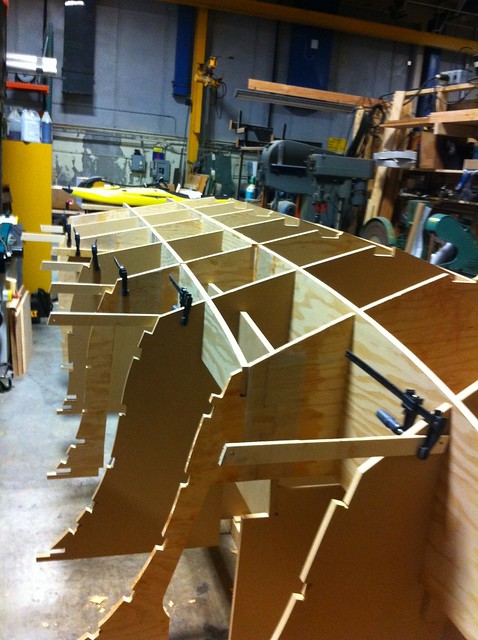
Having surmounted the strongback issue, we’ve now positioned all the frames over the stringers and the next step is to bond them in place so it all becomes a single, rigid assembly. Once this is done, there’s no going back, and precision here is critical for creating a foundation for a symmetrical, plumb and sound boat.
The frames were all marked with a waterline and centerline during the CNC phase. The centerlines were aligned over a taught string positioned along the middle of the strongback. That was easy. Aligning the waterlines was harder. In the end we clamped some small, straight boards along each waterline so that they stuck out to the side. We could then sight along the boards and rest levels on them to get everything lined up and plumb.
Once I had triple checked everything, I bonded it all in place using cabosil-thickened epoxy to create 3/8″ radius fillets on all four sides of each vertical intersection. (Note that you don’t bond the MDF pieces to the plywood since they’re temporary…)
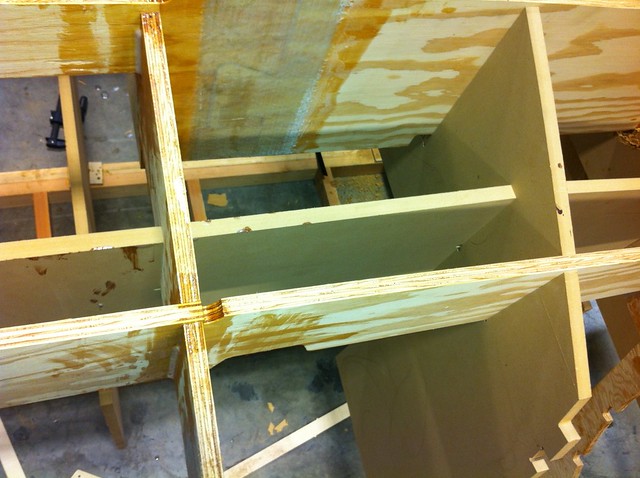
In the above image, you can see that I left the fillets a bit short of the bottom of the boat (which is the top of the board). That’s because the frames and stringers will all get bonded to the hull skin when applied, and I want to have a clean intersection of the radius on the vertical joints and the hull joints. That’ll be easier if I come back and finish the frame-stringer fillets once the hull is on and turned.
-Ben