
Or, more accurately, “longitudinal.” We’ve got the plywood framing all in place at this point and it’s time to start laying the lengthwise timbers.
“Longitude” as a posting title, however, gives me a chance to plug an exceptional book of the same title by Dava Sobel. You’ll never take your watch for granted again after you understand the scope of the human effort that went into developing a method for keeping time that could remain accurate while aboard a vessel rocking on the ocean. Pendulums don’t like that much…
But I digress.
Whereas thus far, with the exception of the stem, we’ve been working exclusively with sheet lumber – plywood and MDF – we’re about to start working with more traditional boatbuilding materials. We’ll be constructing longitudinal members by laminating together strips of V.G. Doug Fir as necessary to make the bends required by the design. We’re starting with the bottom-most side stringers, which you can see clamped up in the following photo:
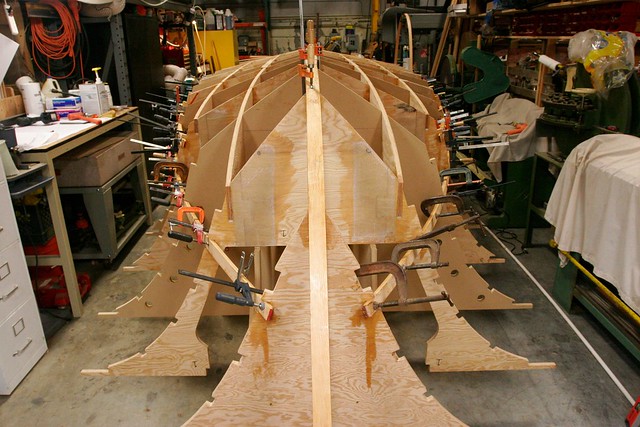
The required final dimension for these stringers is 3/4″ wide by 1-1/2″ tall. To get that, we’ve ripped 8/4 planks into a set of 3/8″ strips, and then laminated two thicknesses of strips together on the frame to build each stringer. This composite glue-lam construction is required because the bends are too great to complete with a single piece of wood that’s 3/4″ x 1-1/2″, but there’s an added benefit that a well-laminated composite member is stronger than a single member of the same dimensions.
One thing we’re beginning to discover at this stage is that the number of clamps you have is often a binding constraint in how much work you can do in a day. I bought 40 clamps at the beginning of this project. That was nowhere near enough to laminate these members. My friend and neighbor Wolfgang has generously loaned me about 40 more and with that I can generally do two simple stringers at a time, or one more complicated one. Since each layup needs to cure overnight, this often means we do about 3-5 hours of work and then have to quit because we can’t go any further until the clamps come off.
One other point to note here… I glossed over a step that’s actually quite critical and takes time to do well. As you can see, the stringers are not generally perpendicular to the frames where they cross them. That means that they’re not parallel to the notches in the plywood that were cut for them by the router. I don’t have a good photo to demonstrate this for a stringer, but you’ll get the idea from this photo of the stem where it crosses the forwardmost frame:
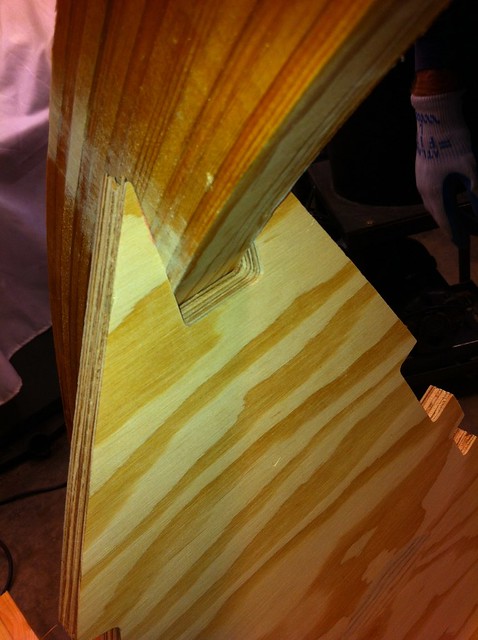
The stem only touches the frame right at the front.
With all of these frames, the “controlling dimension” is the back of the frame. If anything in front of that prevents a part from resting properly on the back of the frame, it has to be cut away, and cut away in a fashion that creates a good gluing surface along the entire length of the bond. My friend Shawn Hibmacronan came to the rescue here with a loan of an awesome 3/8-Inch Makita Belt Sander. This thing rocks. I just went into each slot with the sander and ground away enough material for a perfect fit. I now own one. This thing will save me countless hours.
Anyway, before I could laminate these stringers in I had to go and do all that shaping. If you look closely in the photo of the layup, you can see that some of the other notches are already shaped.
-Ben
PS – It may look like I’ve installed the stem at this point, but I haven’t. It’s just resting there right now.