Traditionally, I guess the first thing you did when you built a boat was to lay the keel. Or maybe that’s just with ships too big to be built upside down. I don’t know, but I do know that I did a lot of work before I got to the point it was time to assemble the keel. But that time has come!
The first step is to laminate the aft portion of the keel. This is done in place, on the frames, so that it fits the contours perfectly. But you have to be careful not to actually bond it to the frames because you have to be able to remove it after it’s bonded so you can shape it to mate with the stem.
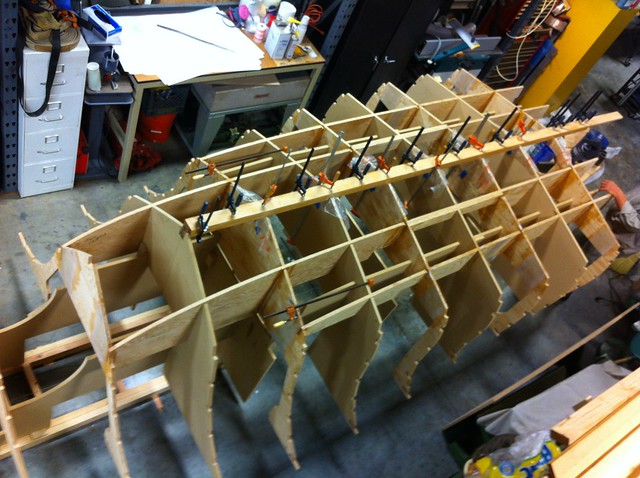
Here’s the keel being laid up. If you look closely you can see that there’s a piece of plastic between the keel and the frames at each station.
Here’s a shot from the aft end of the keel…
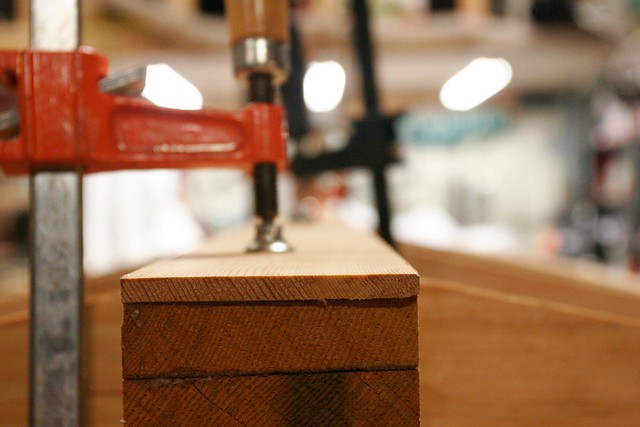
Don’t stress about those cracks in the bottom member. The keel overhangs the transom by a fair bit at this point and the cracks only run an inch or two forward. Besides, that piece is now bonded to the one above it, which will hold the cracks together. This is one of the many reasons a composite board is stronger than a single board of the same dimensions.
Once the keel cured, it came off the boat and got fitted up with the stem. That required that the forward end of the keel be tapered in on both sides, and that a notch be cut from the stem to create a longer joint. These were then clamped and bonded in place on the boat. Here’s a shot of the whole kit ‘n’ kaboodle being clamped on the boat. The Stem is the part on the left, including the protrusion that sticks aft of the MDF frame by a bit before tapering down. The keel is the lighter-colored piece that’s resting on top of the protruding portion of the stem.
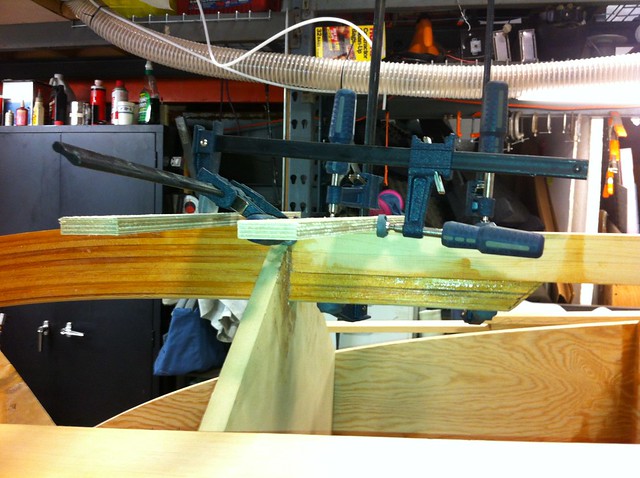
Those two small pieces of plywood on the tops of the two parts were nailed there temporarily to give a purchase point for applying clamping pressure to pull the two together. then it was clamped in a couple of other places vertically along the 10-or-so inch long joint.
The keel is 3″ wide and 1-1/2″ tall. The stem is 1-1/2″ wide and 3″ tall. That’s why the keel needed to be tapered in the forward end to fit. That was an amusing operation for which I don’t have a photo. Basically we cut wide of the mark on the bandsaw and then snuck up on the line on each side using a 24″ pedestal disc sander.
The keel is done! Long live the keel!
-Ben