Sanding, sanding, sanding.

Sorry for another unacceptable hiatus in updating our progress.  And… sadly… I don’t have any photos to share this time.  Basically we’ve been sanding for the past week.  Once the planking is finished, you need to smooth things off enough that you can apply fiberglass.  This means using a thickened epoxy mixture to fill all the staple divots and other dings and serious low spots, and then using a sander to knock down the high spots.  The goal at this stage isn’t to get it perfect, it’s just to get it close enough to glass.

The two critical items are these:

1. Sand down the high spots s0 that you don’t need to add unnecessary filler after applying the fiberglass.

2. Make sure everything is smooth enough that the glass will go on without bubbles, bridges, etc.

To knock down the high spots I bit the bullet and bought another new tool.  A Hutchins Hustler linear air sander:

These things are expensive, but they’re great.  Seriously cuts down on the time and suffering associated with fairing a hull.

I’m pretty sure that as of this evening, we’re good to go on both counts.  We bought 24 yards of 1808 glass this afternoon and unless something goes awry we’ll be glassing the sides tomorrow morning, and hopefully the bottom on Friday.

After that the serious fairing begins.  We’ll fill all the low spots and sand until our arms have fallen off to get it as fair and smooth as we possibly can before priming and painting.  Exciting stuff.  With a little luck we’ll have the hull done by the end of the month and be on to the interior in September.

-Ben

The last plank

Oh joy.  Oh rapture.  The planking is done.  This took a lot longer than I’d expected and was a lot more difficult that I thought it would be, but we saw it through.

Here’s the place the last plank goes.  The pink stuff is epoxy with a thickening powder in it:

And here I am gleefully applying the plank:

And better yet, here is the last frigging staple that will need to be removed from the planking, just prior to its removal.  Pulling staples sucks.  My dad and I have the blisters to prove it.:

Honestly, after the planking was done I was a bit lost for what to do next.  It’s been over a month of a wash-rinse-repeat process of cutting planks to length, spiling them to fit, applying adhesive and stapling them home.  It requires little thought and lots of persistence.  Now we have to think again.

While my brain got to working again, I whiled away the time by catching up on my additions to my father’s graffiti:

There’s one more that decorum demands not be shared in this forum.

Anyway, after noodling a bit, I decided to re-examine the voids that I’d initially thought I’d need to flip the boat over to repair.  Once the planks were trimmed to length and I climbed under with a bright light, I realized the situation wasn’t as bad as I’d thought.  So we’re going to fix them from underneath.  I’m happy about this plan since flipping the boat comes with significant risk, and going from one turn to three wasn’t an appealing prospect.

Anyway, in order to work under the boat we need to lift it up a bit to gain access.  For that we need cribs.  No… Not the MTV kind.  The timber kind.  So it was off to Home Despot to pick up a dozen and a half 10′ 2x4s and a box of nails.  An hour later, we’d built a pair of very stable, 2.5′ square cribs that would support the strongback about 18″ off the ground.  Then we used the gantry crane to hoist first the front of the boat, and then the stern, onto dollies so we could roll it back in the space a bit.

Then – again one end at a time – we hoisted the whole boat onto the cribs.  Et voila:

Next up: trimming the bottom edges of the side planking flush with the sheer clamps and sanding things flat enough to allow us to install a 3/4″ thick doubler on top of the clamp.  This gives us a solid cap for the planks, and a stout backing for the sheer guard / rub rail assembly.  It’s hard work sanding upside down.  Here’s my dad doing yeoman’s duty:

Once the prep was done, we scrounged through our pile of lumber to find odds and ends that could be milled down to create glue-lams for the aft doublers, and then glued them in place.  Here’s the port one all glued up.  You’re looking at it from inside the boat.:

These are made from odds and ends, so the pieces aren’t of consistent width.  Doesn’t matter, nobody’s going to see it.  Ever.

Once that was done, we did some sanding on the hull sides to get them smooth enough to begin applying fairing compound, and then applied a base coat of epoxy thickened with Low Density Fairing Filler on the starboard side:

This was a “runny” coat that I wanted to use in part to seal the wood so, and in part to flow into gaps between planks, etc.  It doesn’t completely fill the staple divots or the gaps, but it’s a start.  Going forward I plan to use a different product – Silver Tip Quick Fair – which is pre-thickened and cures to a sandable hardness in under four hours.  That means we should be able to do multiple coats per day, which should help a lot.

Tomorrow it’s off to MacBeath again for the first time in a long time.  I need to get one more 20′ Doug Fir 1×12 to mill into strips to build the doublers for the forward part of the boat.  That’s going to be an interesting process.  The aft ones were easy since you could clamp them to the sheer clamp.  In the forward parts of the boat this won’t be possible because of the flare angle of the bow.  We’re going to have to come up with a strategy for clamping…

Using our brains again.  Excellent!

-Ben

Nearly there

Several more hours on planking today.  We started by pulling yesterday’s staples.  I really wish the plastic staples would penetrate the plywood, but they don’t.  Sigh…  I think there’s a heavier gauge of staple I could have bought that might have been better for plywood.  There’s a huge difference between going through a 1/6″ solid wood plank into a solid wood stringer vs. a 1/4″ plywood plank into either plywood end-grain or just plain plywood.

Anyway, once the staples were out it was off to the races on finishing the port side’s second layer of bottom planking. The second layer was a LOT harder to install than the first due to the direction the planks lie on the hull, and what that means to the curve.  With the first layer they were moderately concave and easy to hold in place.  The second layer ends up with a deceptively sharp curve to form over up toward the bow.  This problem is made trickier by the fact that you have to lean pretty far over to work.  But … well … mission accomplished.  The port side is done, and we put the four planks on the starboard side that we were able to install before we ran out of room and had to wait for the port to cure.

As he often does, my friend Shawn stopped by this afternoon to check the progress.  As I’ve mentioned before, he is a very talented artist.  Anyway, he made an observation that never would have occurred to me when he noted that the little plastic tabs we shoot the staples through so they can be removed have an artistic quality about them.  He’s right.

I’m currently accepting commissions if you’d like your own version to hang at home.  Alternatively, you can just go to Home Depot and scavenge a bunch of strapping that lumber comes bound up with and staple it to a piece of plywood with a staple gun.  But if it makes you feel better I’m happy do it for you and charge you a bunch for the privilege.

-Ben

Tastes like chicken

My father loves his dog.  In some respects, this is a perfectly normal state of affairs, but when one probes more deeply it becomes a bit odd.  First off, my father has, for as long as I can recall, claimed to despise dogs.  We had them growing up.  He hated them.  Wanted nothing to do with them.  Actually took a swing at one once and, thinking better of it mid-throw, pulled his punch and ended up hitting a post accidentally instead, breaking his hand.  Speaking of hands, when out and about, whenever he saw someone walking a dog around the neighborhood he would form his right hand into an imaginary pistol and “shoot” the dog being walked.  On more than one occasion, the animal’s poor owner noticed this bit of theatrics and recoiled in horror.  My father has always hated dogs.

Now, it’s clearly rational to think that the slow march of time might soften the heart and that there might be a place for a dog in his world.  A nice black lab, perhaps?  Or a blue tick hound?  Maybe a shepherd of some kind?  A terrier?  Any of these have a degree of masculinity and utility about them that would make them seem to fit with his persona.  The dog he dotes over, however, is this thing:


It’s a fluffy little furball with an underbite, an annoying propensity to howl, and a rather disinterested relationship with humanity that smacks of superiority.  Honestly it’s more like a cat.  And my dad is definitely not a cat person.

Anyway, this is a long-winded introduction that’s necessary to help us understand that in much the same way construction workers will etch their names in foundations in places that won’t be seen when the building is finished, but that marks forever their contribution to the effort, my father feels compelled to scribble his dog’s name, Paca (Palo Alto, California) on the boat to forever enshrine it, entombed in epoxy and paint, but there for the knowledgeable.

And so, from time to time, I find “PACA” scrawled on the boat without explanation or excuse.  I’ve had enough.  Today I started fighting back.  Here you can see my addendum to his scribblings.  I’m going to make a habit of this going forward.

As for the boat, we’re making progress on the bottom planking.  Here’s a shot as of this morning, with one side completed and the other side partially complete and with a second layer started.  Since this photo we’ve finished the first layer on the port side and done the aft part of the starboard.  We’ve got about half the boat still to go on this last layer of bottom planking and then we’ll be done with the planking!  I’m looking forward to that.  I’m getting a little tired of spiling and stapling at this point.  It’ll be nice to do something – anything – else.

Oh, and I got the CNC machine up and running.  Still a bit more to do for it to be operational, but here’s a shot of it cutting out its own vacuum table plenum.  Really all I need to do at this point is finish the plenum and then plumb up the vacuum system and it’ll be DONE.

It’s kinda funny having this tool up on the mezzanine, bridging between the table and the pallet rack, but it’s really turning out to be a pretty good place for it.  All the work happens “inside” the machine, and it’s not hard to get a piece of material that’s as big as the machine will allow up there, so it gets it out of the way.


That’s it for today.  Onward and upward!

-Ben

Progress

Forgive me, dear reader, for the unacceptable hiatus between updates.  The knee incident slowed our progress some, my helper was away, and … well … things just got busy.  That said, I have progress to report!

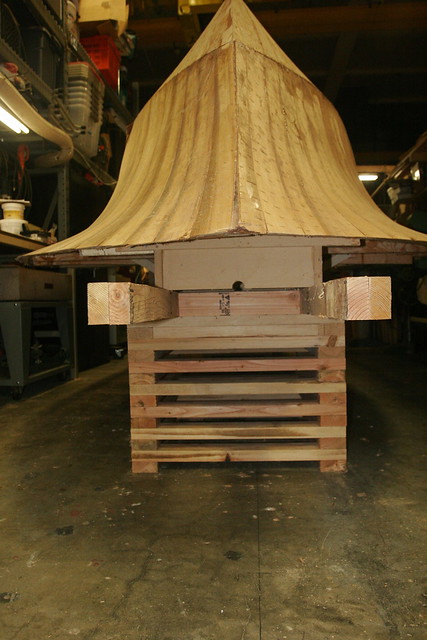
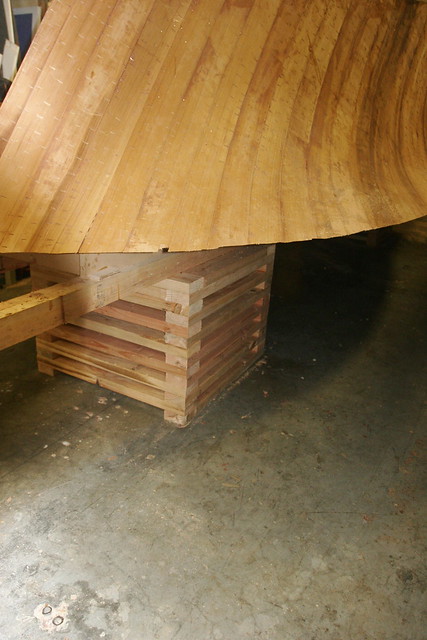
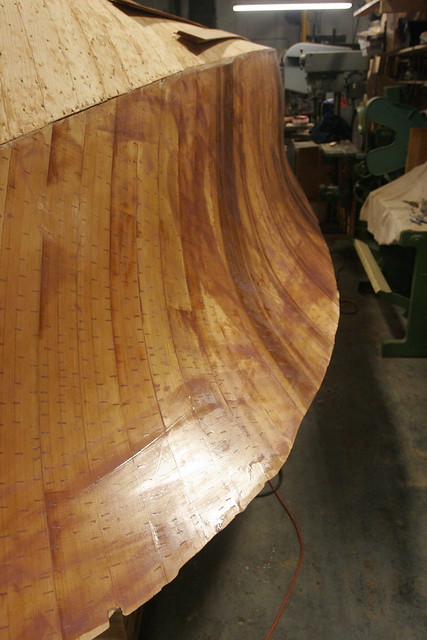
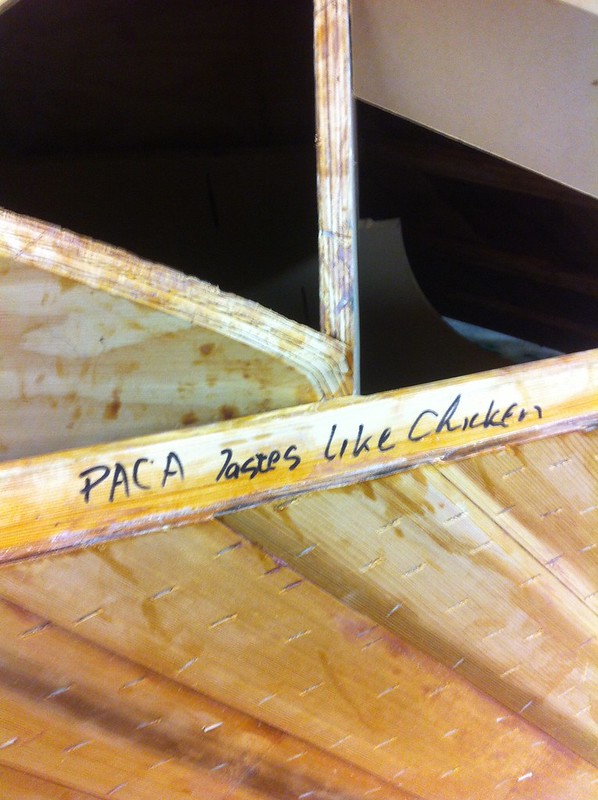
When last I wrote, we hadn’t started layer three of the side planking.  Since then, we have completed layer three.  I say again… WE HAVE COMPLETED LAYER THREE!  This means we’re done with the side planking.  Sweeter words haven’t been written in the last 90 seconds.  Here’s the finished bow area.  Trust me, the out-of-frame areas aft are equally magnificent.

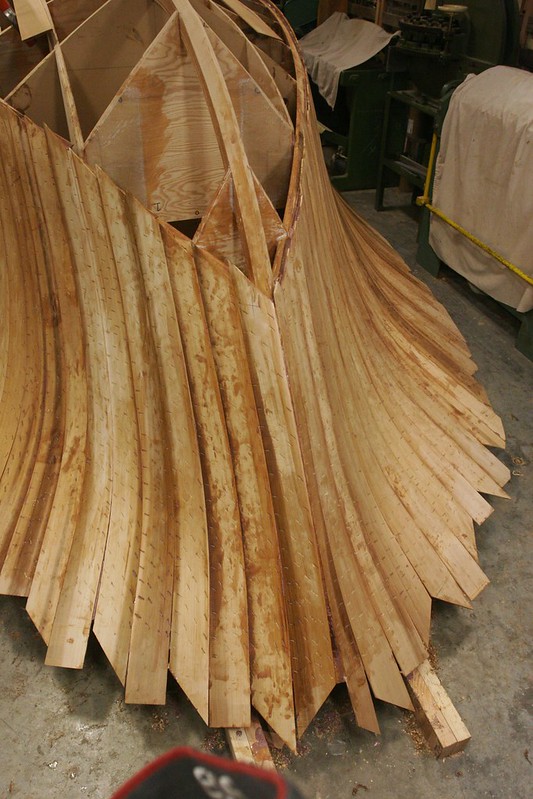
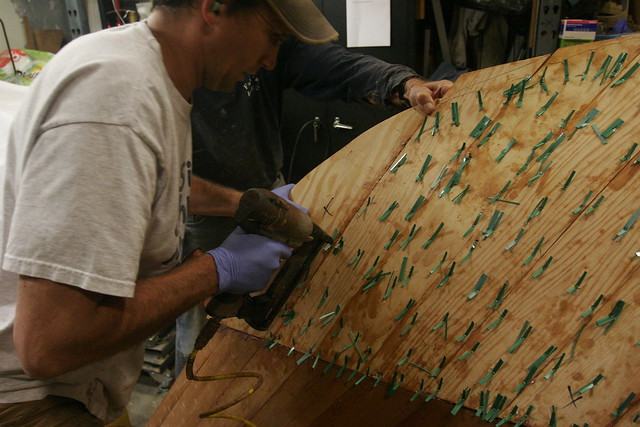
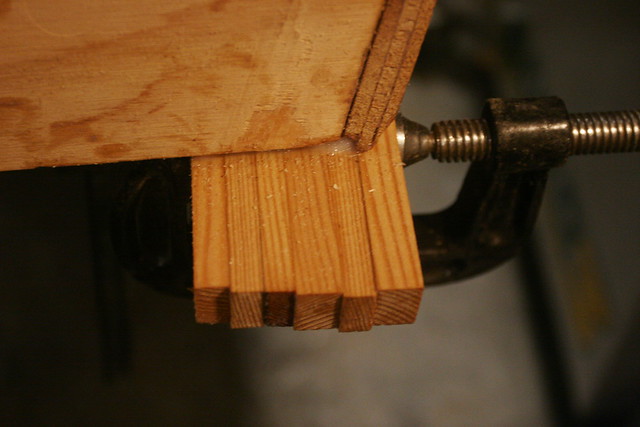
In the wake of the myriad issues with voids in the bond between layers 1 and 2, we changed our technique a fair bit for layer three.  First off, we coated both the hull and the plank prior to applying the plank to the hull, and we coated the hull side much more generously.  The goal was to get a lot of squeeze-out, which would ideally mean that epoxy was being squeezed into any voids between the layers as well.  We also shot a lot more staples.  You can see in the image above that there’s a staple for about every 2-3 square inches of wood.  Staples are cheap(ish).  Fixing holes sucks.  Easy decision.

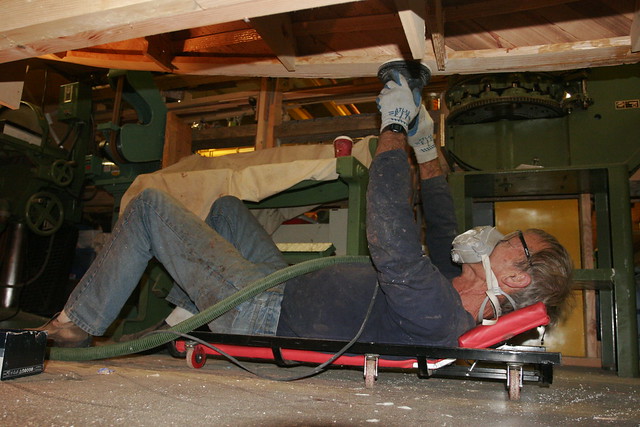
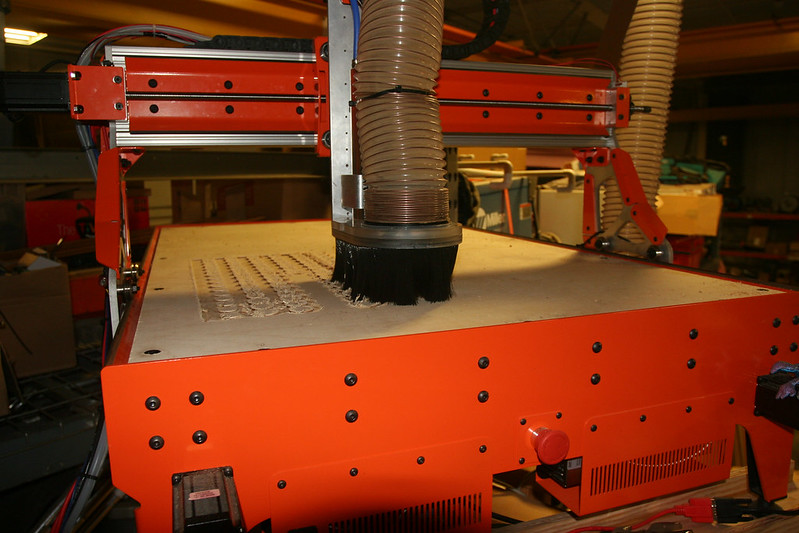
Once we finished layer three of the side planking, my dad went to host some guests at Fallen Leaf for a few days.  During that period I did a couple of things.  First, I made great headway in setting up my new CNC machine.  I still have a ways to go – primarily sorting out some spindle control issues and building a vacuum table – but the machine moves in all three axes,  it’s got a working spindle, and I’ve routed the dust collection hose.  Here’s an older photo.  I’ve since added a table (which needs to be turned into a vacuum table), mounted the VFD and added a vacuum hose.  The vacuum shoe arrived from KentCNC today, so when I get back to the shop I can fire up the machine and turn the table blank into a vacuum plenum.  Then I just have to plum the vacuum and it’ll be DONE!

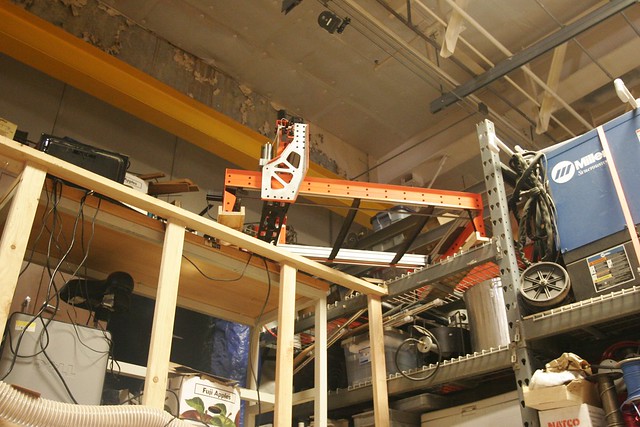
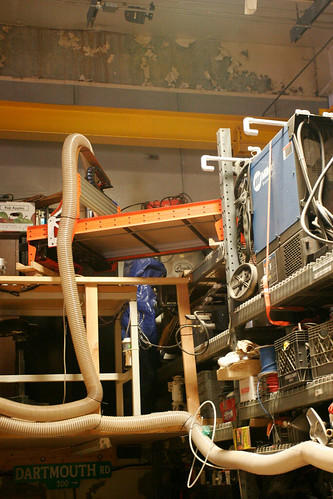
Yes, this is a very strange place for a machine.  15′ off the ground, spanning a table on an oddly constructed mezzanine and a shelf on some pallet rack.  Fingers crossed that OSHA doesn’t do a surprise inspection and that there’s no major seismic event any time soon.

My dad got back yesterday.  I really miss him when he’s gone.  It’s so much nicer to be in the shop with a partner.  Anyway, we started by ripping four sheets of 1/4″ marine-grade Doug Fir plywood into 4″ strips.

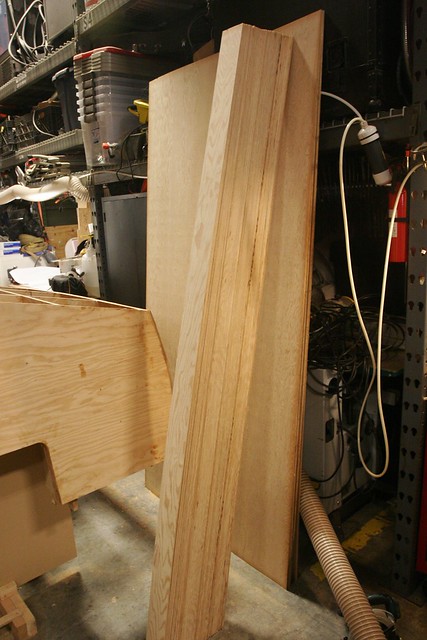
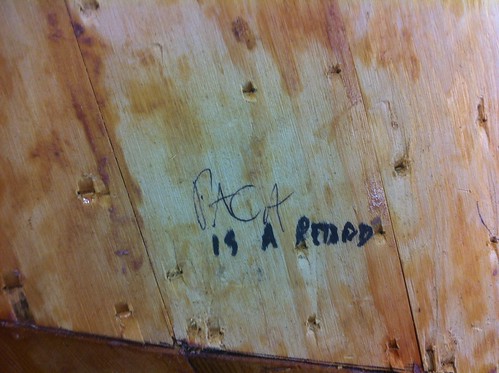
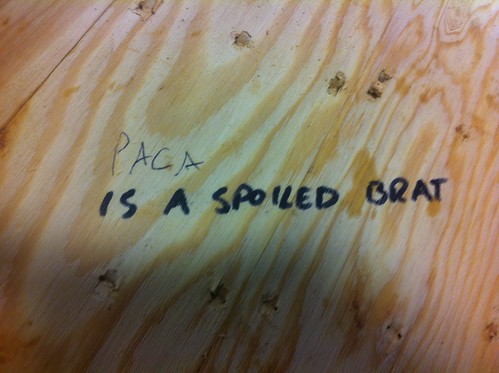
Note:  The primary difference between marine grade and standard exterior grade plywood is that marine grade should have no voids in the interior layers.  You pay a healthy premium for this.  While in general, the material is good, I present the following photo as evidence that “no voids” really means, only a few and they’re small.  Interestingly they’re all located near the center of the planks.  I’m guessing it’s a misalignment where two 4′ wide interior veneers come together, but who knows…

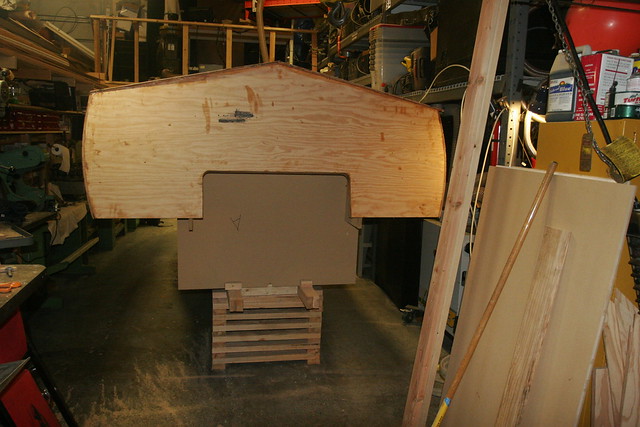
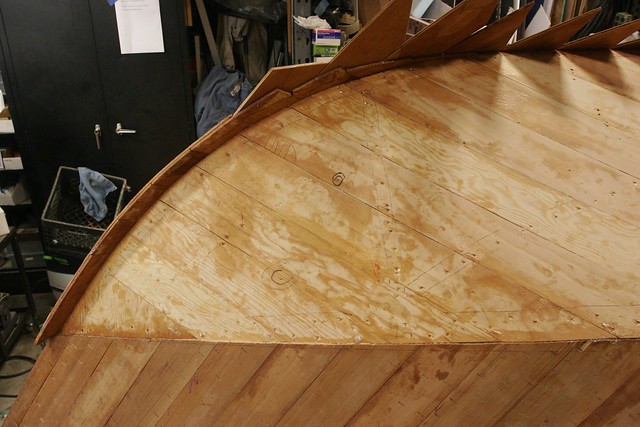
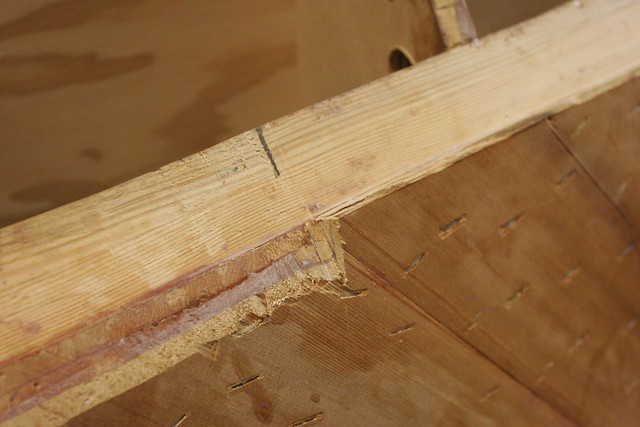
The other thing I did while my dad was away was to prep the chine area to accept the bottom planking.  In the aft parts this just means fairing it consistent with the rest of the bottom line.  In those areas, the bottom planking laps the side planking.  It’s easy.  As you move forward, eventually the angle becomes so steep that you can’t use a lap joint anymore.  the plywood part would end up being faired to a ridiculously thin, knife-like edge.  So you transition to a butt joint.  Here’s a shot of the transition zone. To the left is the stern.  To the right is the bow.

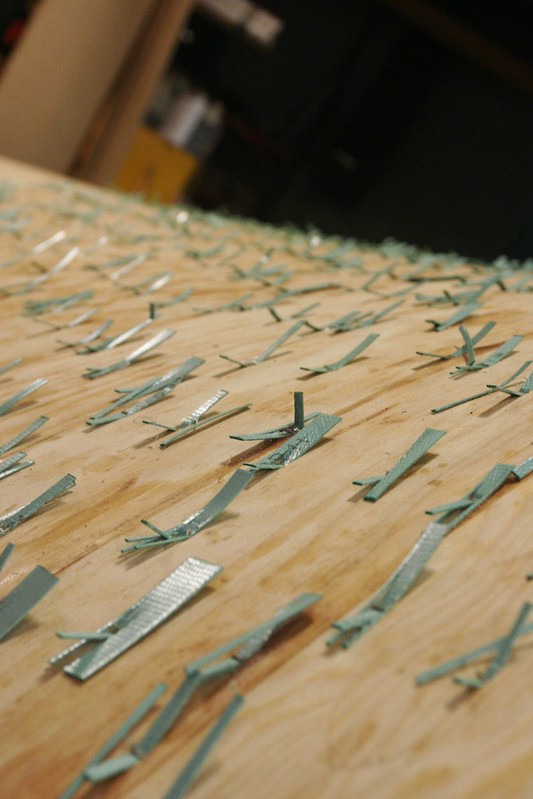
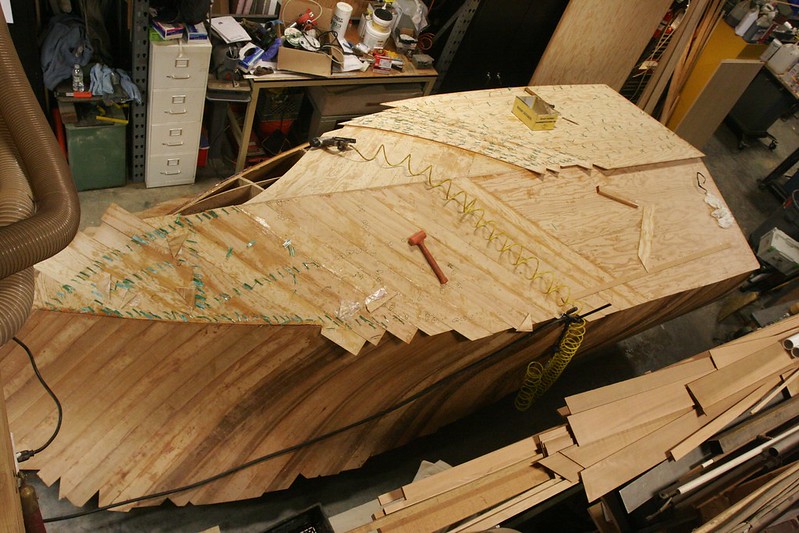
Anyway, the aft part of the boat is pretty flat, so you don’t need to use 4″ strips there.  You can just use a sheet of plywood.  But you need to miter the end to set up the 45-degree angle for planking the forward areas.  Then you start planking with 4″ strips.  This is what it looks like:

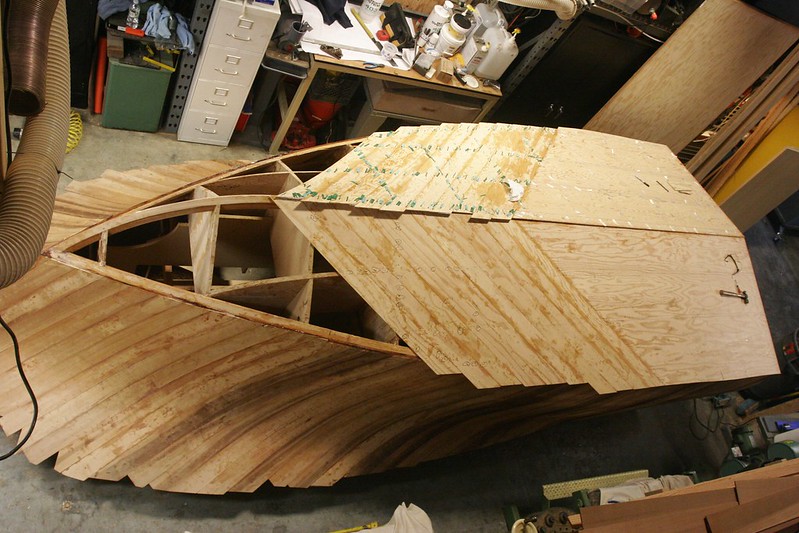
The observant viewer will note a couple of things:

1. We didn’t finish one side before doing the next.  That’s because there’s a temporary bit of framing that’s a late-add from Timm that I need to install before I can plank the forward parts.  I needed to get Chris to cut that for me since my CNC is still not operational, and he’s been slammed.  So we went as far as we could on the starboard side and then moved to port.

2. The little green tabs are back.  We’re planking the bottom in two layers of 1/4″ plywood, and the plastic staples were having a very hard time penetrating.  They were kinda disintegrating on impact.  So after a few hours of screwing around with the stapler we just gave up and went back to the one that shoots metal staples.  Fortunately there are fewer required on the bottom, which means we don’t have as many to pull.  But it still sucks pulling staples.

Anyway, you’re looking at the latest and greatest shot.  I’ve got to take a few days off, but will be back at it early next week.  Chris got the frame pieces cut for me this afternoon, so we can install those (which will be fast, and start working our way forward.  Should be pretty fast.  There’s a lot less spiling required on these planks than there is on the side planking.


-Ben


Grumble

Well, team, it’s been a rough couple of days.

For starters, I’ve found (and fixed) a bunch more places where layer one and two didn’t bond properly.  I’m pretty sure I’ve found them all at this point, but it just makes me nervous.  I’ll be using a lot more staples on layer 3.

Which brings us to… the delays getting layer 3 started.

This really is a two person job, and my dad needed to go to Tahoe for a couple of days.  That ended up getting extended a few more for some really good reasons.  Now we’re ready to get started again, but I tweaked my knee two days ago and am currently laid up on the sofa doing the RICE thing. (Rest, Ice, Compression, Elevation).  Pretty sure it’s a tear in the MCL, but who knows.  Anyway, this is a major issue given how much kneeling and squatting one has to do to install a layer of planking.

And finally, while my dad was away I did some trimming of the overhanging planks to get them to their “correct” size, at which point I discovered that at the bottom of the overturned hull (ie, the top of the hull) there are some pretty flared places in the planks that need to be filled with resin.  For gravity to be on our side in that process, we’ll have to turn the hull over, which means the hull is going to get planked, turned, fixed, turned, glassed and painted, and then turned back over.  This is extra work, but completely necessary.  Sigh…

No photos for now, there’s nothing new that’s photo-worthy.

More as it happens!

-Ben