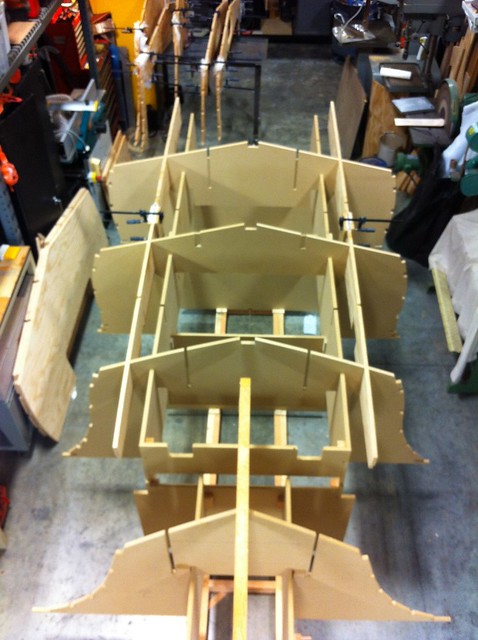
In the pictures you saw of the strongback, there were some transverse members that may have looked boat-like to you. Those, however, are temporary forms made of MDF. When the finished hull is turned over* they will be cut up and removed. Chris has now cut out all of the plywood parts and it’s time to start working with them. The stringers go on first, followed by the frames. The frames, stringers and strongback are all notched to fit together so it almost feels kit-like at this stage.
Here’s a shot with the stringers installed on the strongback.
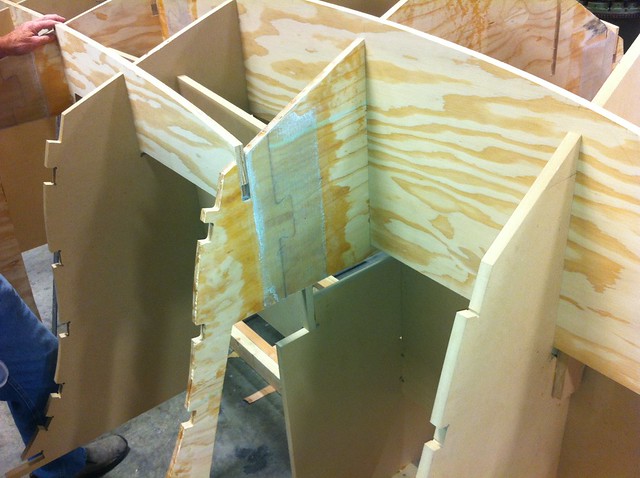
Actually, they’re being glued up using the strongback as a mechanism to hold them in place, but you get the idea. Many of the parts are either too big for a single sheet, or divided into multiple pieces to allow better use of the expensive sheets of plywood (about $100/ea). Timm very nicely creates locking “puzzle piece” joints that make it really easy to align parts that need to be joined together. While the stringers were curing, I was also assembling the multi-part frames to install over them. Here you can see how that works. Puzzle-piece joint, epoxied together and then reinforced on both sides by a strip of 1808 glass.
This picture gets us a bit ahead of ourselves, however. More on that in our next installment.
-Ben
*Note: I assume this is self-evident at this point but for those that don’t know, a boat is nearly always built upside down. The hull is taken to completion – including paint – in this position and then the whole thing is turned over and the interior is finished.