Category Archives: Framing

The Transom Debacle

The transom of this vessel is made of three – yes three – layers of 3/4″ Doug Fir marine plywood.  That is a very heavy duty transom.

Thinking that it might be tough to get all the air out of the layup when bonding them together, and also that it would be tough to get even clamping pressure by stacking weights on the thing, I opted to vacuum bag the transom layup.

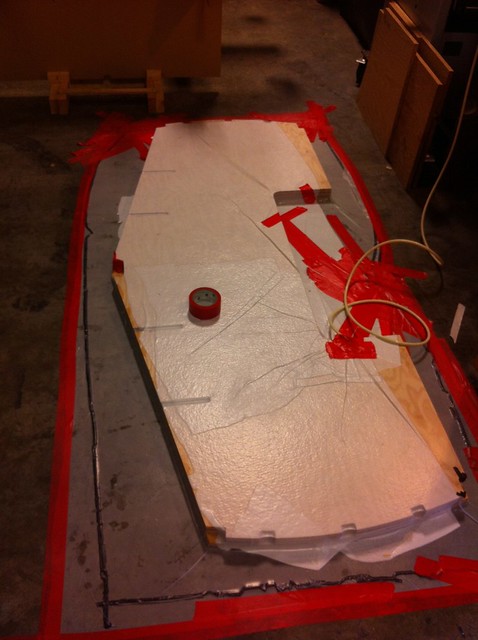
I did this by bagging it to the very flat and crack-free floor of my shop.  After some initial challenges getting a good seal, it worked quite well.

Unfortunately, however, I screwed it up completely.  No, dear reader, it wasn’t a bad layup.  The three layers were bonded together impeccably.  Instead, I aligned them incorrectly.  The three layers are not identical.  This is because the transom is tilted backwards on the hull, and so to develop a straight line through the layers you want the notches and motor well opening staggered.  This is hard to explain without a photo, and I don’t have a photo, but suffice it to say I lined them up incorrectly.

This rendered $300 worth of marine ply useless.  Sigh…  I guess this is one of those eggs you break making an omelet?

Anyway, after mentioning this to Timm he suggested that I’d really be better off just laminating the first two layers together to start with, and then adding the third after trimming the side stringers and chine logs flush with the ends of the portions of the transom in which they seat.  I guess that’s a bit of a silver lining, because in retrospect it made things a lot simpler.

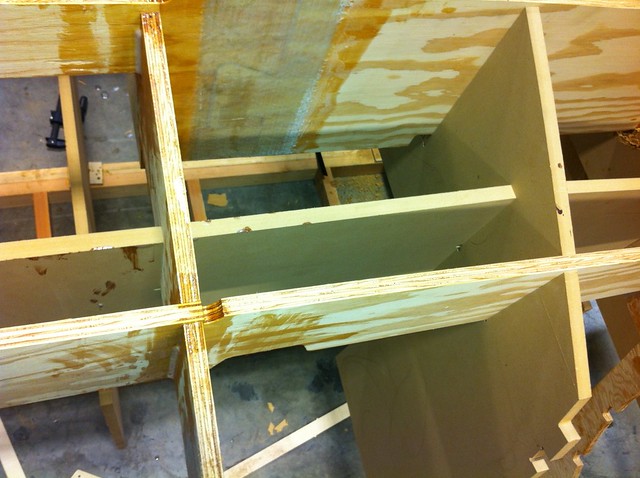
The vacuum bagging had been a bit of a pain, and I now had a 75 pound object that was exactly the shape of the thing I wanted to clamp, so for the 2nd go round I opted to forgo the bagging and just use weights.  After rounding up most of the heavy things from around the shop and stacking them on the bad transom on top of the good one, I let it cure overnight.  Of course, having foregone the bagging, the lamination didn’t go perfectly.  There was a spot in the lower corner of the port side that didn’t get bonded very well.  I was able to inject a bunch of epoxy in there though and get it pretty fully bonded with clamps after mounting it to the hull.  I have no concerns about its integrity.

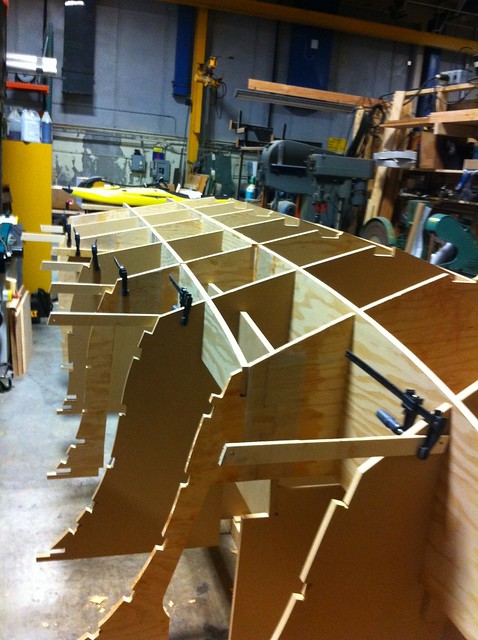
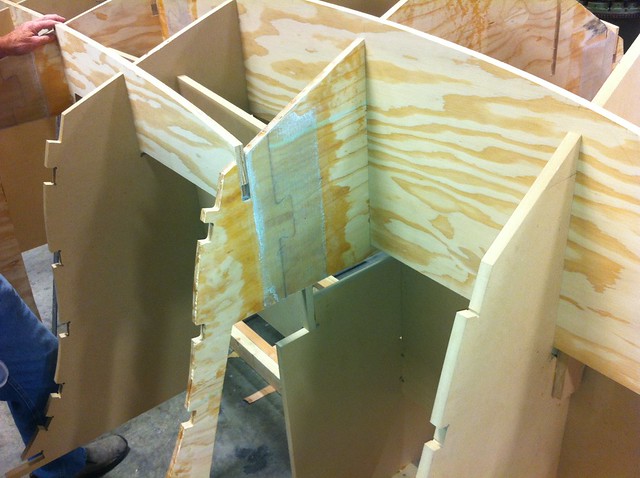
Here it is, all bonded up to the stern of the boat.  A careful observer will note that this is actually from a bit later in the process, but I don’t have a picture just after mounting it.

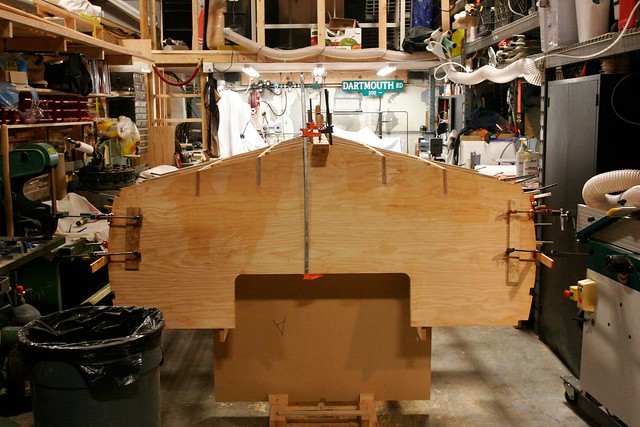
Getting it bonded on was relatively straightforward, though I did have to cut away a bit more of the strongback to make it all fit.  This was one of those cases I mentioned where I was comfortable enough that I was doing the right thing that I didn’t bother checking with Timm.  My bet is that it’s a function of the fact that I’m using Doug Fir plywood whereas he designed for Okoume.  Okoume is a little nicer to work with and is considerably lighter, but Doug Fir is stronger and much cheaper.  I’m unemployed.  I like cheap.

-Ben

PS – I’m pretty sure the statute of limitations on stealing street signs is less than 20 years, but if you live on Dartmouth Rd. in a Bay Area municipality I won’t name, please forgive a youthful act of indiscretion by an elated high school senior.

Committed

Up to now, with the exception of laminating the stem, there’s been a lot of CNC cutting and a lot of dry assembly.  But nothing really has been glued up and made permanent in a really-hard-to-undo kinda way.

Having surmounted the strongback issue, we’ve now positioned all the frames over the stringers and the next step is to bond them in place so it all becomes a single, rigid assembly.  Once this is done, there’s no going back, and precision here is critical for creating a foundation for a symmetrical, plumb and sound boat.

The frames were all marked with a waterline and centerline during the CNC phase.  The centerlines were aligned over a taught string positioned along the middle of the strongback.  That was easy.  Aligning the waterlines was harder.  In the end we clamped some small, straight boards along each waterline so that they stuck out to the side.  We could then sight along the boards and rest levels on them to get everything lined up and plumb.

Once I had triple checked everything, I bonded it all in place using cabosil-thickened epoxy to create 3/8″ radius fillets on all four sides of each vertical intersection.  (Note that you don’t bond the MDF pieces to the plywood since they’re temporary…)

In the above image, you can see that I left the fillets a bit short of the bottom of the boat (which is the top of the board).  That’s because the frames and stringers will all get bonded to the hull skin when applied, and I want to have a clean intersection of the radius on the vertical joints and the hull joints.  That’ll be easier if I come back and finish the frame-stringer fillets once the hull is on and turned.


-Ben

Strongback issues…

In our last installment, I mentioned we’d gotten a bit ahead of ourselves in the photo I posted.  That’s because you can see, in that photo, both the inboard and outboard stringer in their correct locations, and the plywood transverse frames nested on top of them.  Getting to that point forced us to contend with our first “issue.”

I mentioned before that this is like building a house.  You get plans and build from them.  The plans are not infallible – even the ones fed into the router to produce high precision parts.  A last minute change to the strongback in response to something the other builder had discovered created a minor glitch.

In the image below, you are looking at the port side inboard stringer on the right, which is notched into a frame on the left.  If you look at the top of that intersection, you’ll see that the stringer is not fully “home.”  It needs to slide down an inch and a half before it lines up with the frame.  But if you look at the bottom of the stringer, you’ll see that it’s resting on the strongback already.  No worko.

I assumed for a while that I was doing something wrong and kept scratching my head.  Then I called Timm who scratched his head for a while before discovering the problem.  The solution was simple… Cut away enough of the strongback to let it slide down.

As I write this a few weeks later, I’m getting more comfortable assessing what is and is not likely to be a glitch in the plans vs. a glitch in my execution and I’m pestering Timm a little less.  This was the first one though so I got him on the phone before doing anything rash.

-Ben

Real boat parts going together!

In the pictures you saw of the strongback, there were some transverse members that may have looked boat-like to you.  Those, however, are temporary forms made of MDF.  When the finished hull is turned over* they will be cut up and removed.  Chris has now cut out all of the plywood parts and it’s time to start working with them.  The stringers go on first, followed by the frames.  The frames, stringers and strongback are all notched to fit together so it almost feels kit-like at this stage.

Here’s a shot with the stringers installed on the strongback.

Actually, they’re being glued up using the strongback as a mechanism to hold them in place, but you get the idea.  Many of the parts are either too big for a single sheet, or divided into multiple pieces to allow better use of the expensive sheets of plywood (about $100/ea).  Timm very nicely creates locking “puzzle piece” joints that make it really easy to align parts that need to be joined together.  While the stringers were curing, I was also assembling the multi-part frames to install over them.  Here you can see how that works.  Puzzle-piece joint, epoxied together and then reinforced on both sides by a strip of 1808 glass.

This picture gets us a bit ahead of ourselves, however.  More on that in our next installment.

-Ben

*Note: I assume this is self-evident at this point but for those that don’t know, a boat is nearly always built upside down.  The hull is taken to completion – including paint – in this position and then the whole thing is turned over and the interior is finished.

Let’s fill up the shop

This is probably a good time to address one of the handful of questions that’s asked by virtually everyone that learns I’m building a boat:

“Where are you doing this?”

To those that live in some parts of the country this question might sound a bit absurd, but I – dear reader – live in San Francisco.  In San Francisco, deeded parking spaces can sell for $82,000.  Space is highly, highly limited.  And so, this is not an unreasonable question.

For the past year and a half or so I’ve had some shared shop space on the old Alameda Naval Air Station.  We’re right out by where the Mythbusters film (used to film?) the segments of their show that require large expanses of asphalt.  It’s pretty bad ass.

My section is just barely big enough to fit this project.  In truth, it’s not big enough for the project, but it’s big enough for the boat, and the guys in the space across from me are never there.  I end up pushing a lot of my rolling tools and tables into their stall since it makes space to work.

That point established, after the stem the next thing to come off the router was the MDF parts that can be assembled to form the strongback.  For those that don’t know, a strongback is a rigid, stable form upon which a boat is built.  This is kind of a hybrid strongback/jig that positions everything correctly so you can get going more quickly.

Here’s a shot of the strongback after initial assembly.  You can see that beneath it we constructed a ladder-shaped base of 2x4s.  That gave us something to secure everything to, and also allowed us to create a platform that was plumb so there would be less tweaking of the strongback itself to get it level.  Speaking of level, you can also see the level across the strongback frame.  We spent a lot of time trying to get things square and plumb so we’d be building from a good set of reference surfaces.

In this picture you can also see the large stack of 3/4″ Marine Grade A-B Doug Fir ply that will soon be turned into frames and stringers; my dad dusting himself off, and the very small amount of working room that exists on either side of this thing in the shop.  It’s a tight squeeze.

-Ben

A journey of a thousand miles begins with a single step.

That’s Lao-tzu’s, by the way, not mine.

Anyway, you’ve got to start somewhere, and because Chris was a bit backed up and couldn’t cut everything in a single day, I started with laminating the stem since the stem form was the first thing off the router.

The stem is the curved extension of the keel that establishes the shape of the bow of the boat.  Timm supplied a DXF of the shape so we could cut out a form upon which to laminate it.  Here we are cutting that out on the router:

From there, I took a piece of 8/4 S2S V.G. Doug Fir (actual dimension was 1-3/4″ which is the correct width for the stem) and ripped it into 1/4″ strips.  These were then given a coat of virgin epoxy on both sides of each mating surface, and then one side of each received a heavy coat of cabosil-thickened epoxy.  Early on in the project I was using cabosil as my laminating thickener.  I’ve since learned that while cabosil is perfectly fine, you’re marginally better-off using microfibers in this application. But I digress…

Here’s a shot of the layup on the form.

When declamped there was no noticeable springback.  Over the next 24 hours or so it opened up slightly, but only about 1/8 to 3/16″.  If I can keep this whole project within those tolerances I’m going to be a pretty happy first-time boat builder.

-Ben